How to add a custom animation in interaction
Step 1: Add a new option via bricks/setup/control_options hook
Section titled “Step 1: Add a new option via bricks/setup/control_options hook”Hook documentation: /developer/hooks/filters/filter-bricks-setup-control_options/
add_filter( 'bricks/setup/control_options', function( $options ) {  // Add custom animation into animationTypes  // Note that the key is very important, must be unique  $options['animationTypes']['myAnim1'] = esc_html__( 'My animation 1', 'bricks' );
  return $options;}, 10 );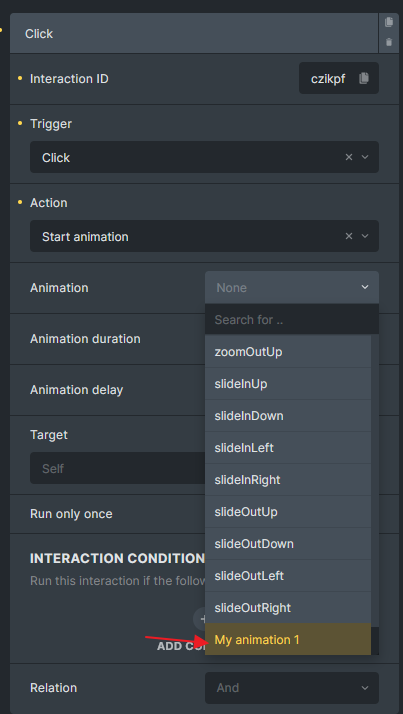
Custom animation added to the interaction “Animation” dropdown
Step 2: Add animation CSS
Section titled “Step 2: Add animation CSS”When the interaction is set, Bricks will assign a class to the element using your animation key (myAnim1 in our example), and it will be prefixed with brx-animate-.
All you have to do is create a CSS class that sets the animation name for your element, along with the corresponding keyframes for your animation. You can place these CSS inside Bricks > Settings > Custom Code > Custom CSS.
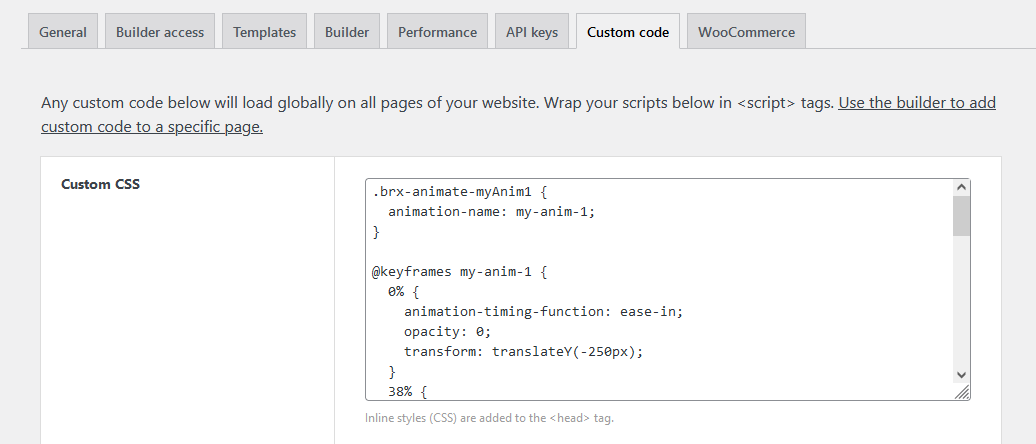
.brx-animate-myAnim1 {  animation-name: my-anim-1;}
@keyframes my-anim-1 {  0% {    animation-timing-function: ease-in;    opacity: 0;    transform: translateY(-250px);  }  38% {    animation-timing-function: ease-out;    opacity: 1;    transform: translateY(0);  }  55% {    animation-timing-function: ease-in;    transform: translateY(-65px);  }  72% {    animation-timing-function: ease-out;    transform: translateY(0);  }  81% {    animation-timing-function: ease-in;    transform: translateY(-28px);  }  90% {    animation-timing-function: ease-out;    transform: translateY(0);  }  95% {    animation-timing-function: ease-in;    transform: translateY(-8px);  }  100% {    animation-timing-function: ease-out;    transform: translateY(0);  }}
Now, you can use this new animation on any element from the “Interactions” panel.
Was this helpful?
A quick vote and short notes help us improve these docs faster.
Leave a note for us
Thanks for sharing feedback. We're using it to improve these docs.