Map
The Map element in Bricks allows you to display Google Maps with a range of capabilities, from showing a single location to dynamically rendering multiple markers based on queries.
You can get started quickly by adding a Google Maps API key. Follow this guide to set it up: How to set up your Google Maps API key.
Without an API key, the Map element is still functional but limited to displaying a single marker only.
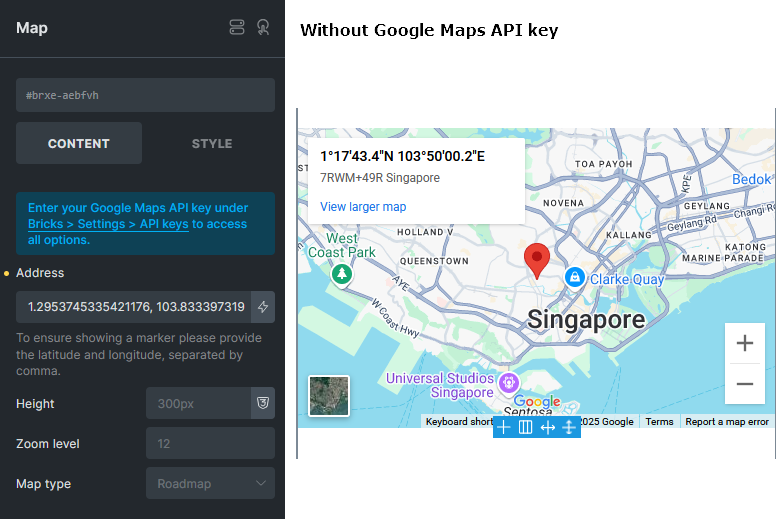
To ensure a marker is shown, simply enter a pair of coordinates (latitude and longitude, separated by a comma) in the Address field.
Displaying multiple addresses
Section titled “Displaying multiple addresses”To unlock advanced features such as multiple locations, clustering, and custom Info Boxes, a valid Google Maps API key is required. Once your key is added, you will see more controls on the element.
Bricks supports three address input modes:
1) Static
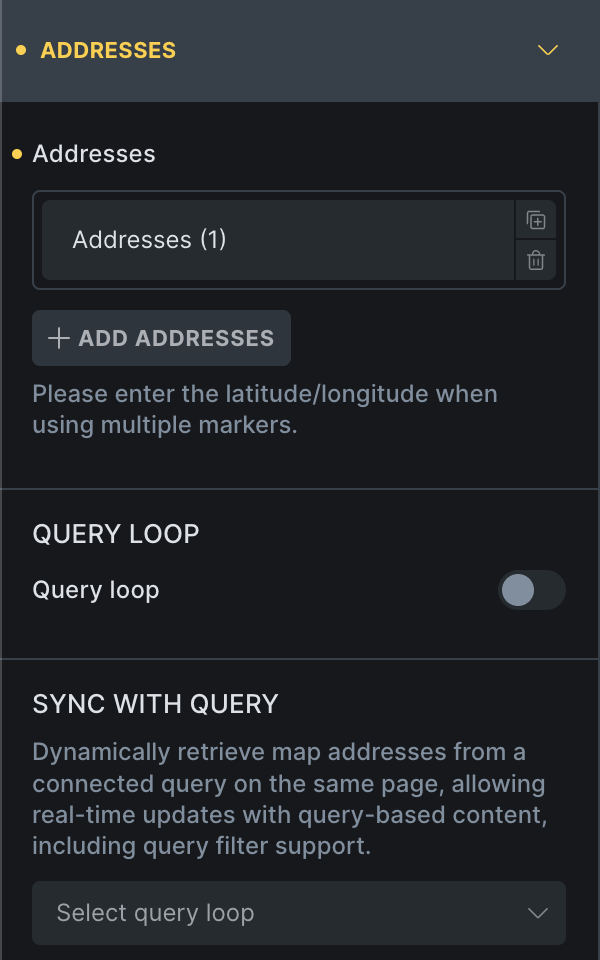
Section titled “1) Static”Manually define multiple locations using the “Addresses” Repeater control of the Map element. This mode supports only the default Google Maps Info Box.
2) Query loop
Section titled “2) Query loop”Use this mode when map addresses to feed the map with addresses/coordinates from a query.
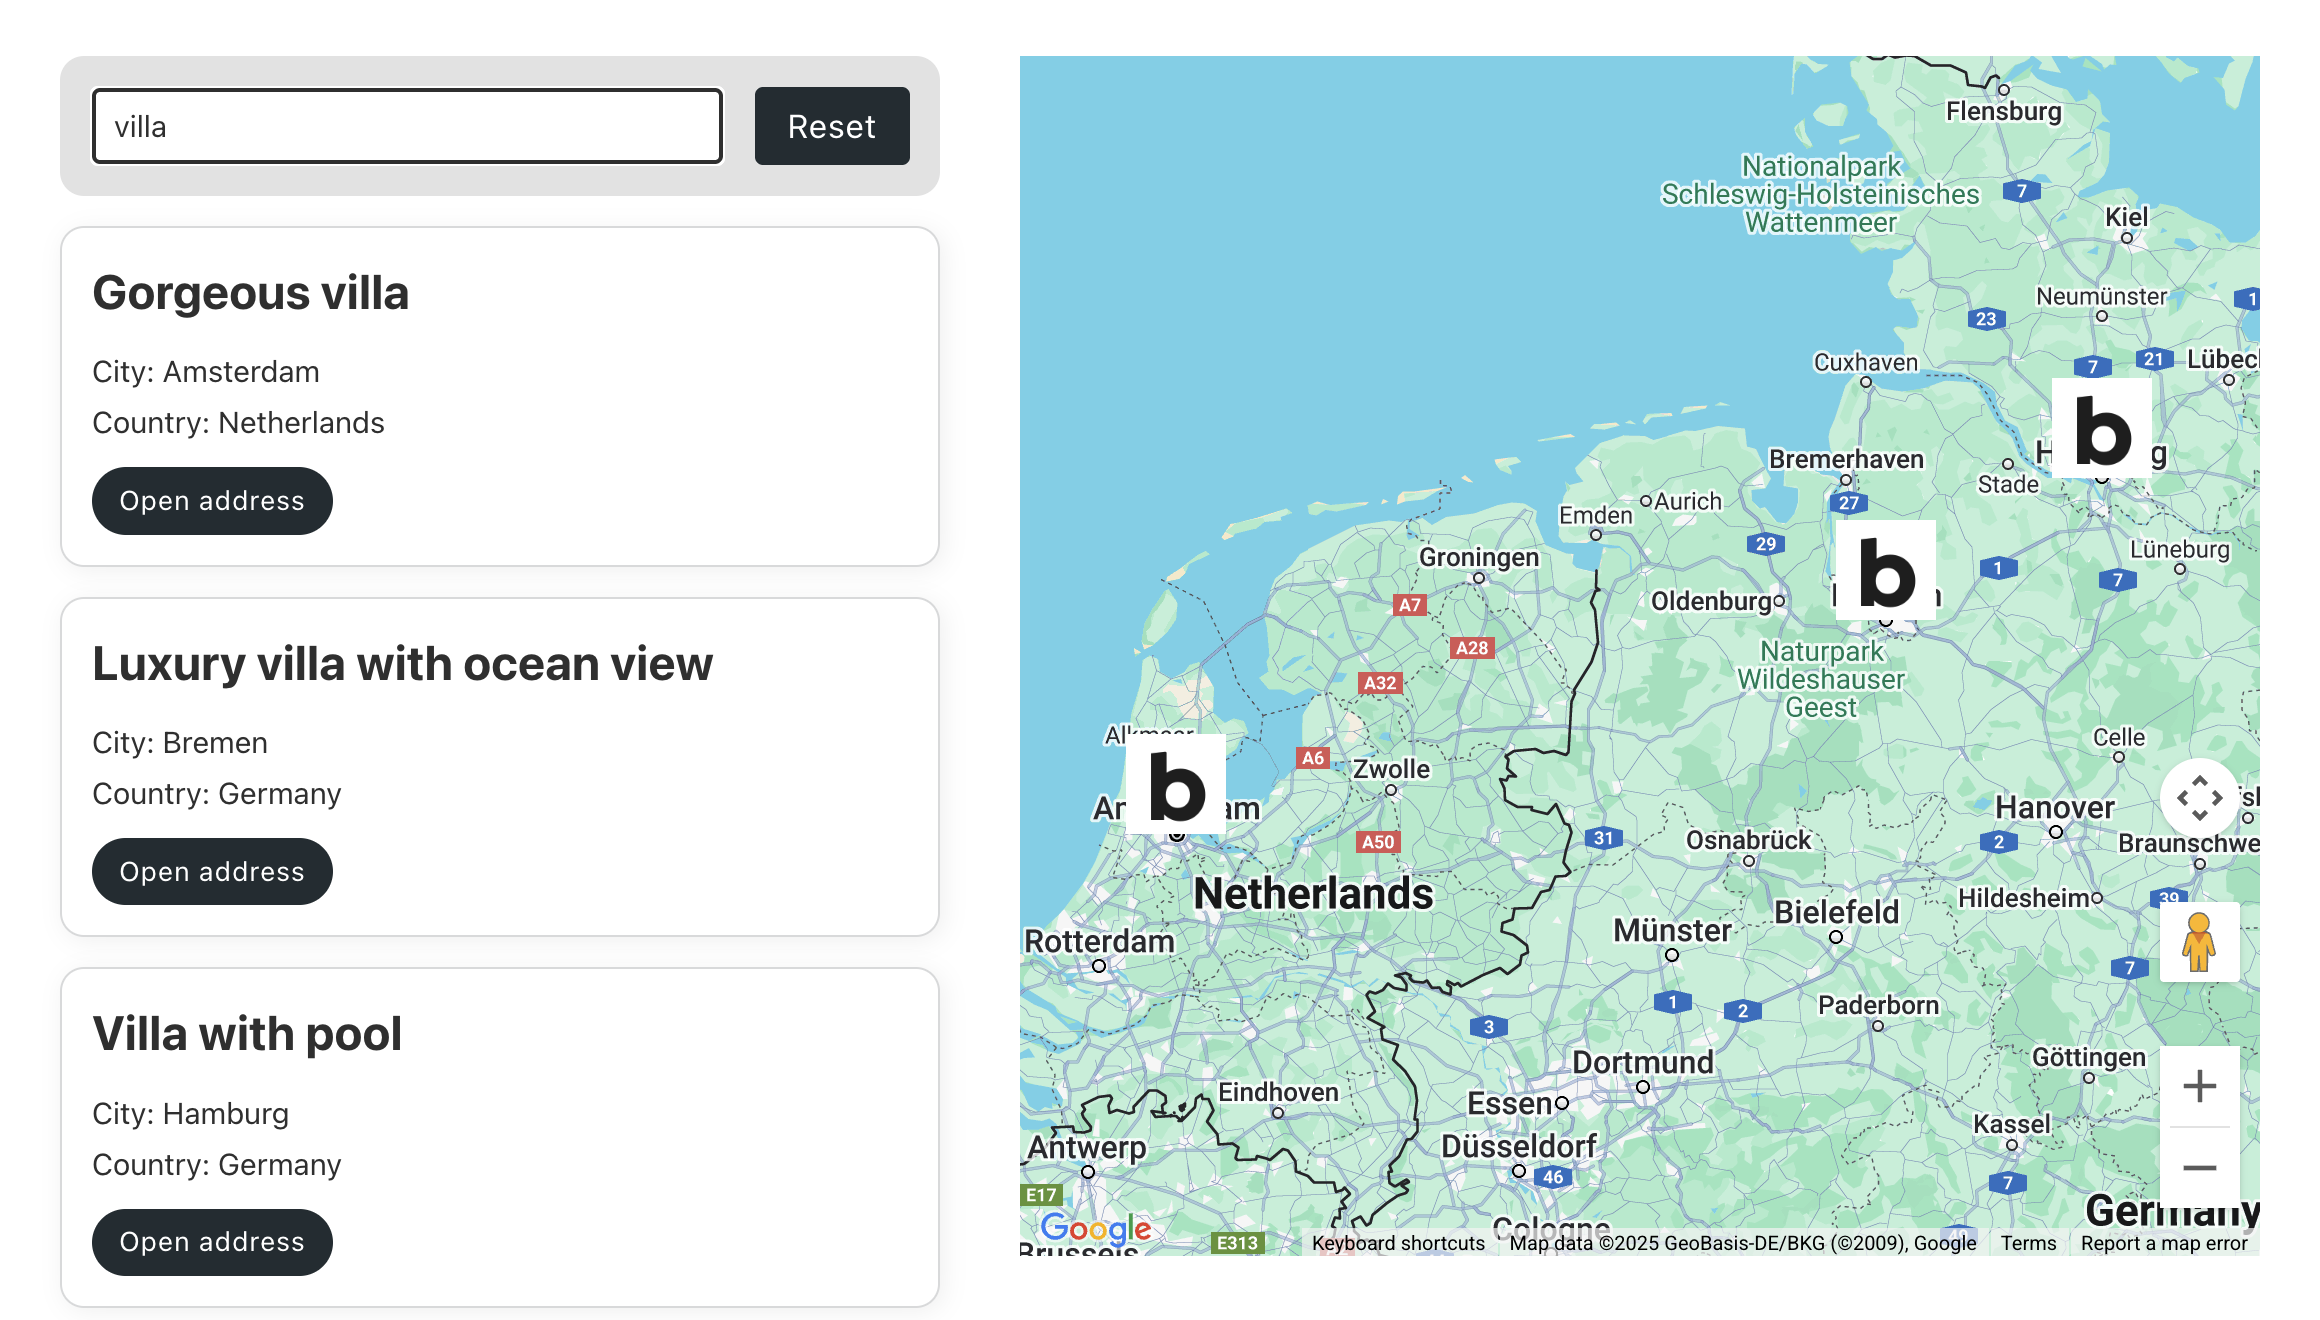
For example, if you have a custom post type like “Properties” where each property contains an address, enabling the Query loop allows you to show markers of all property addresses on the map. (@since 2.0)
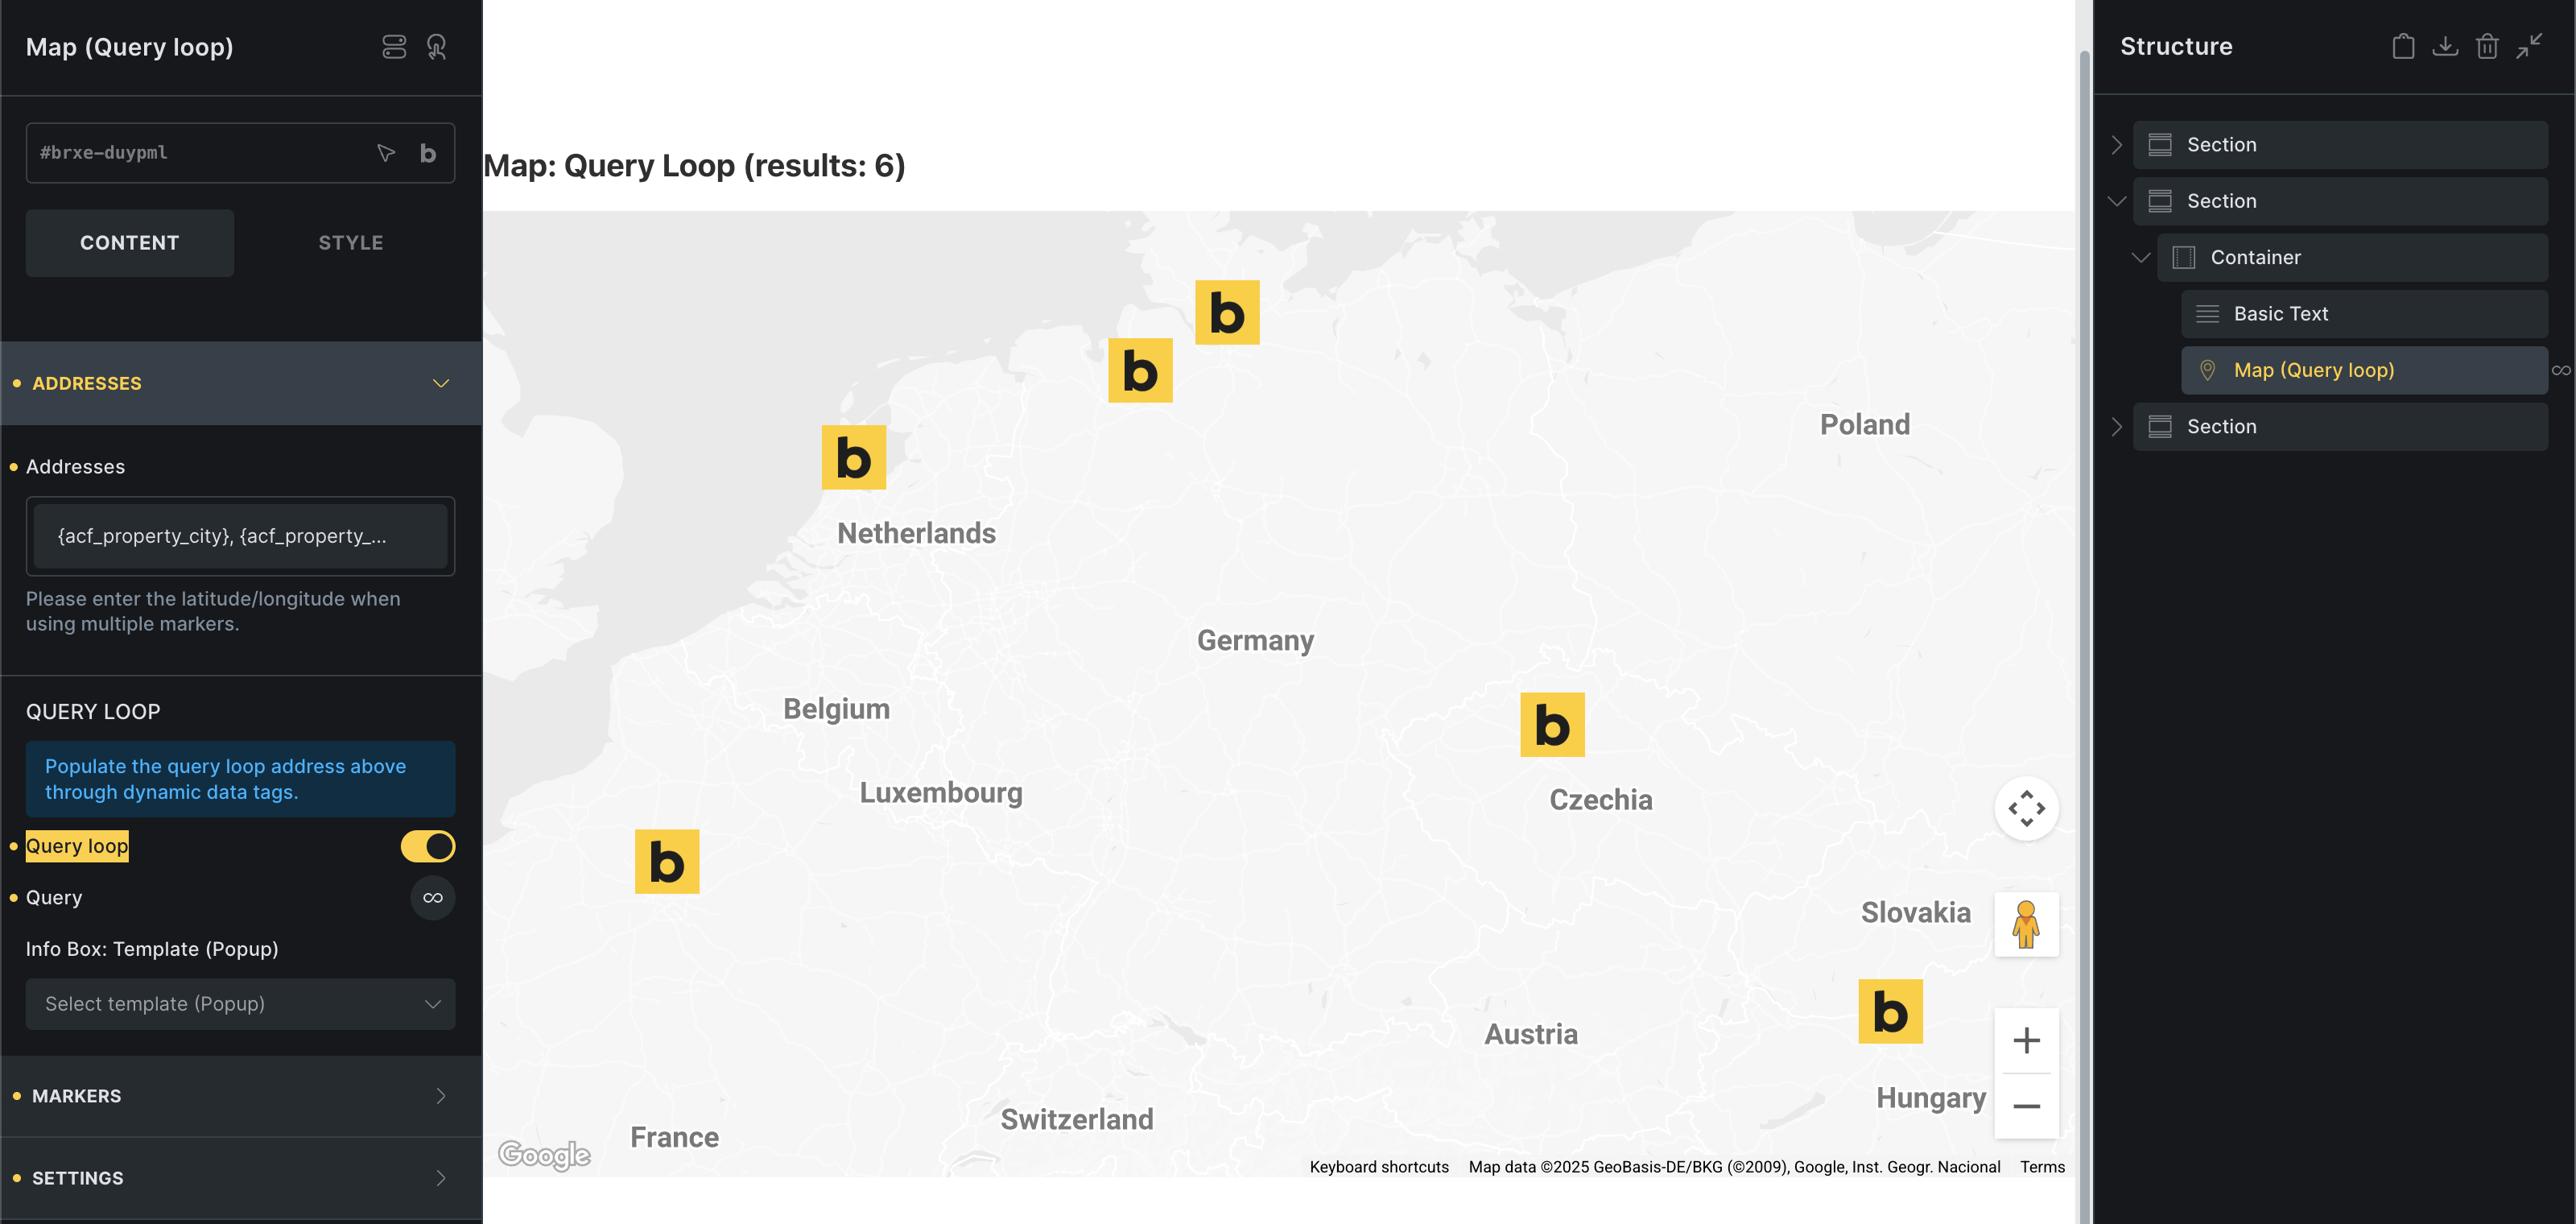
You can also define a custom Info Box using a popup template.
In our example above, we selected the custom post type property, where each address is stored in a custom field (ACF). Providing the latitude & longitude coordinates will be more accurate than a physical address.
3) Sync with query
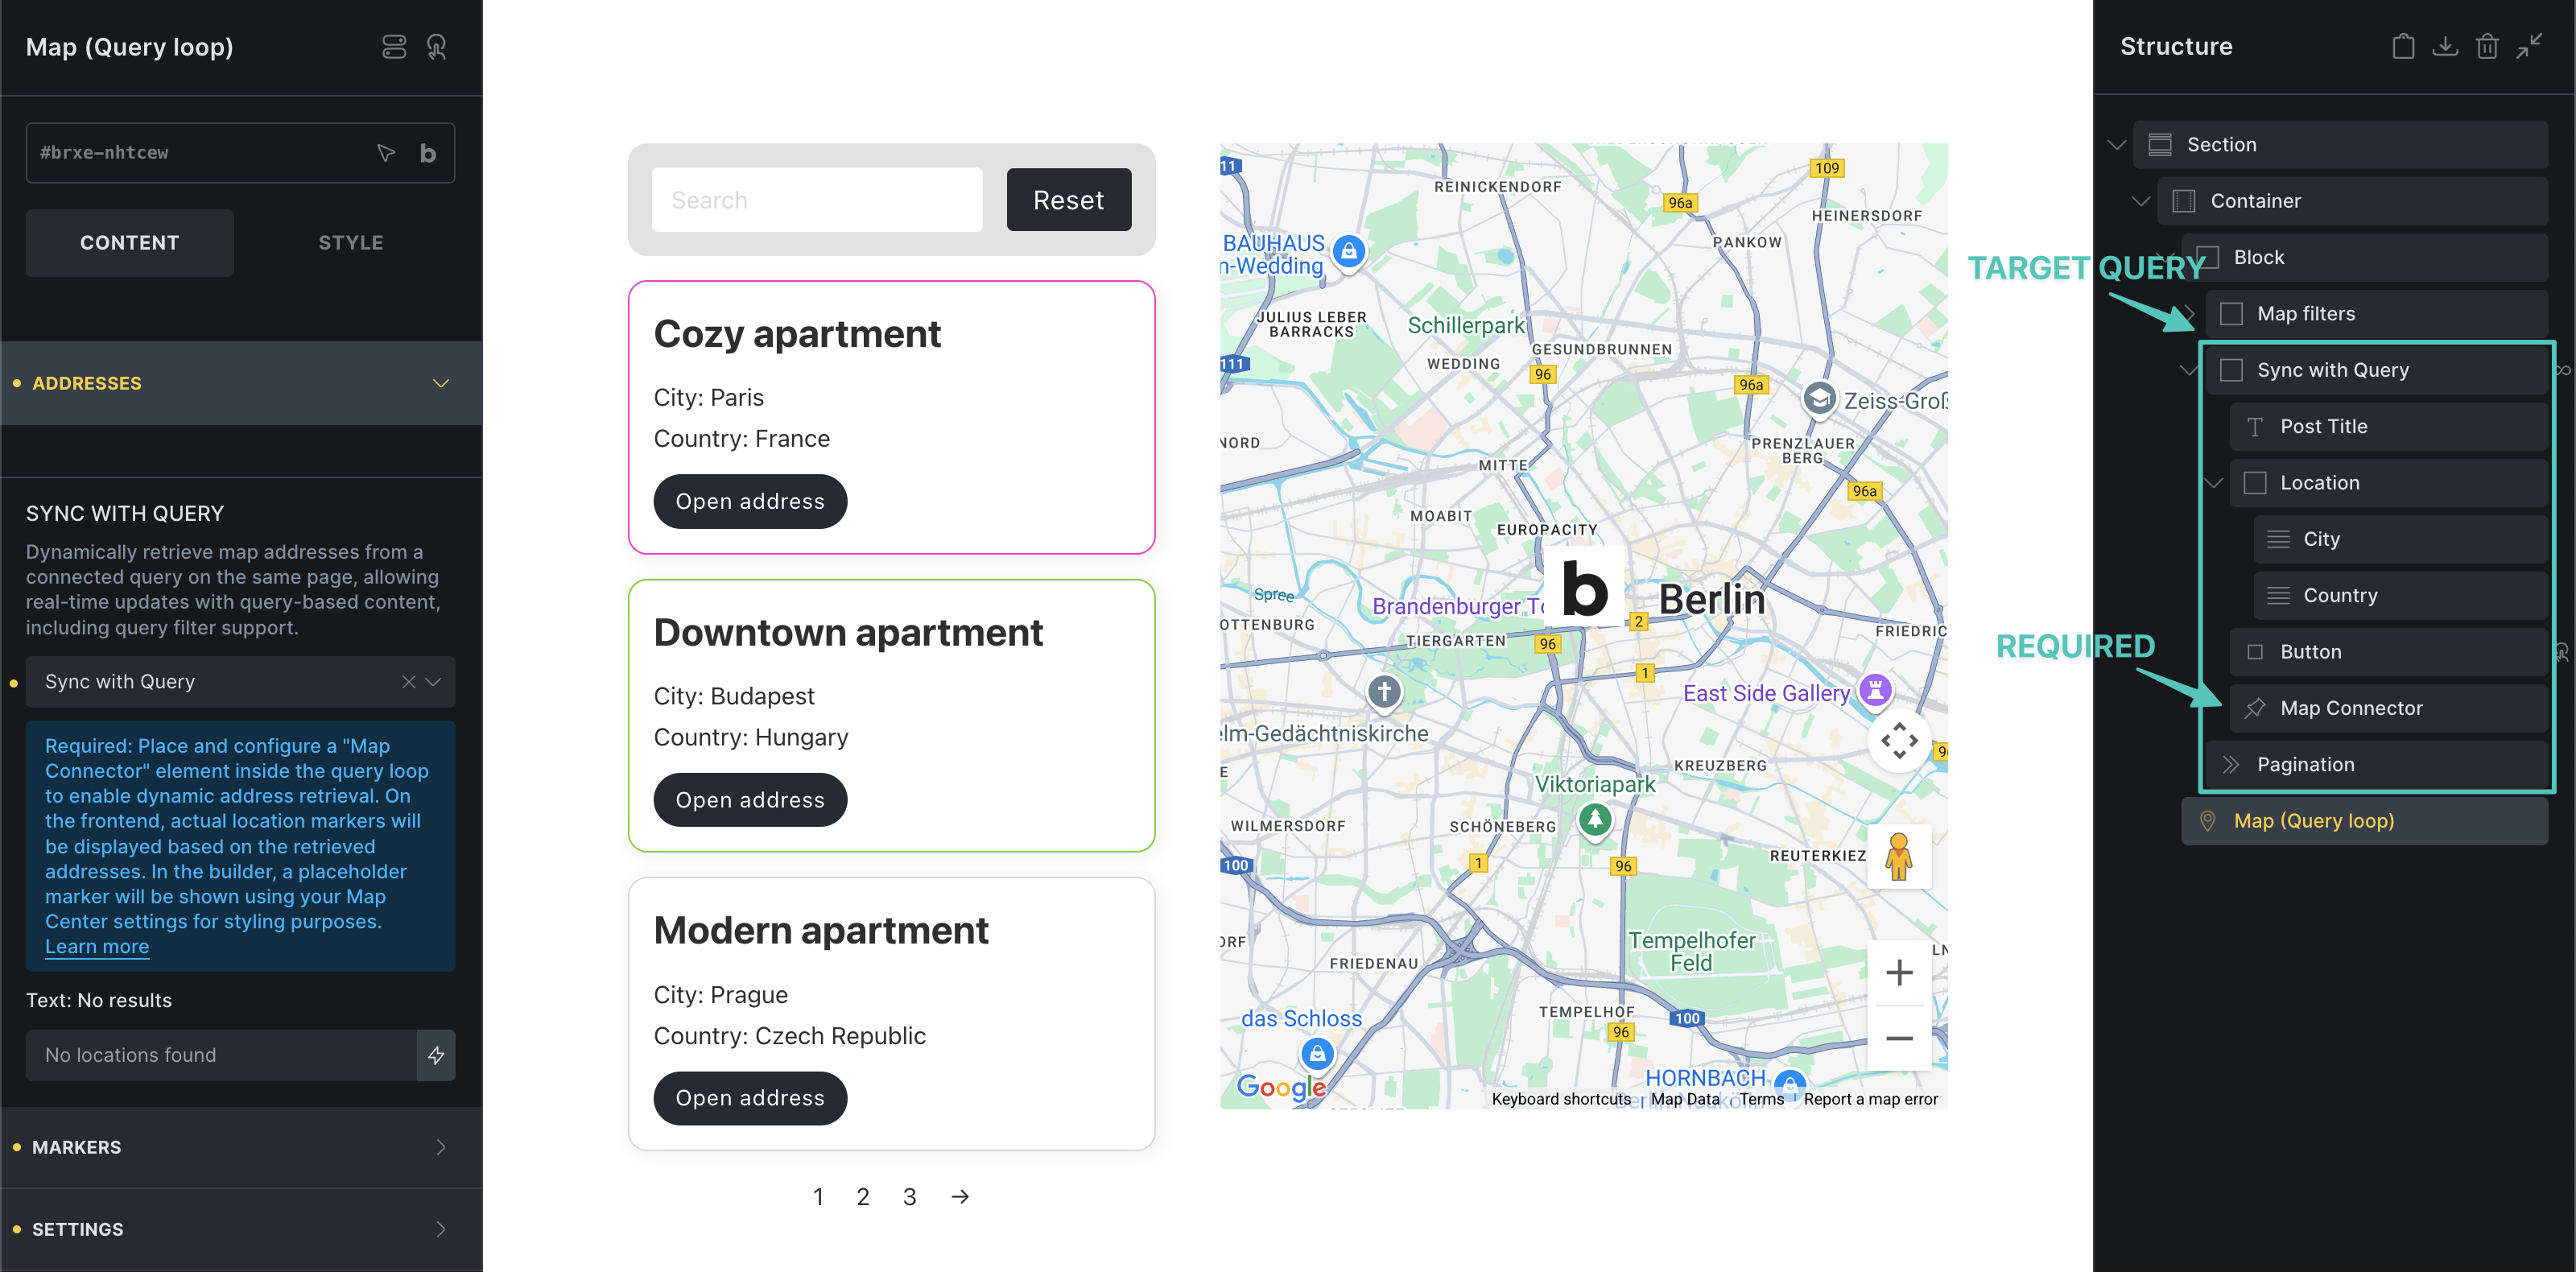
Section titled “3) Sync with query”Ideal for use cases where the map is shown alongside a dynamic query loop such as a directory, Sync with query allows the map to update live with the query as users interact via AJAX Pagination, Load More, or Query Filters.
This mode requires adding a Map Connector element inside the target query loop.
It also supports custom Info Boxes using popup templates.
Example setup: You want to display a query loop on the same page as your map and connect the two. If this query loop uses AJAX Pagination, Query Filters, or Load More, enabling Sync with query allows the map markers to update dynamically in real-time as users interact with those features.
Map markers update according to query results:
Markers
Section titled “Markers”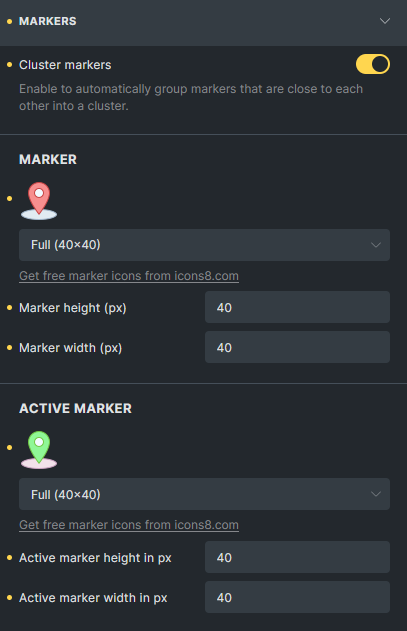
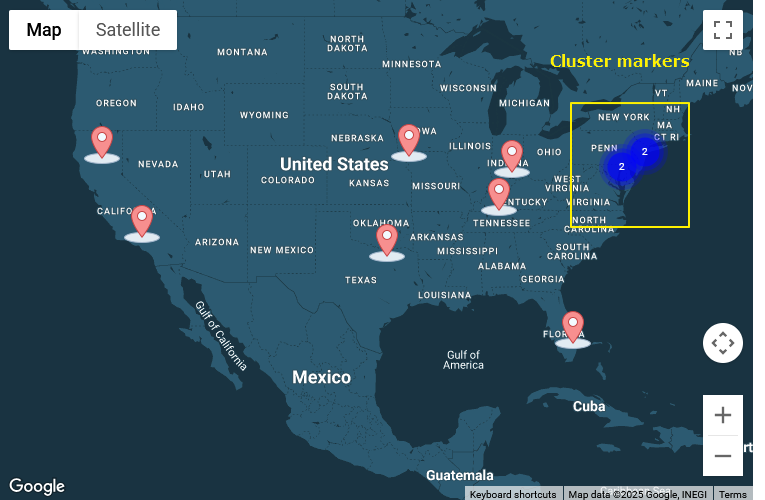
Cluster markers
Section titled “Cluster markers”Enable this option to automatically group nearby markers into a cluster. (@since 2.0)
General Settings
Section titled “General Settings”Map ID
Section titled “Map ID”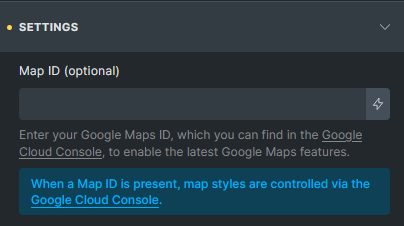
Enter your Google Maps ID (available in your Google Cloud Console) to enable the latest Maps features (@since 2.0)
When set:
- Bricks uses Google’s modern
AdvancedMarkerAPI. - Map styles are managed via your Google Console (style settings in Bricks are disabled).
- Deprecated browser console warnings are avoided.
Map Center
Section titled “Map Center”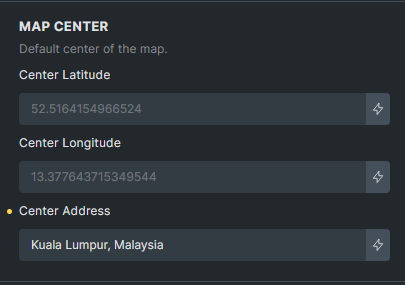
Set the default center point of the map. Particularly useful when using Sync with query—if the synced query returns no results, the map will reset to this center point. (@since 2.0)
Others
Section titled “Others”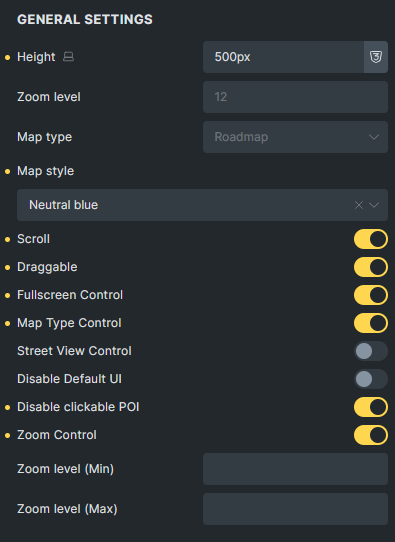
Map Connector (element)
Section titled “Map Connector (element)”The Map Connector element (@since 2.0) is required when using Sync with query.
Place it inside the target query loop that you want to sync with your map. It generates an invisible <template> node containing location data, which is then read by the map to dynamically render the markers.
Note: It’s strongly recommended to provide latitude and longitude values whenever available. If you rely solely on addresses and require geocoding every time markers are rendered, you may incur charges from the Google Maps Platform Geocoding API.
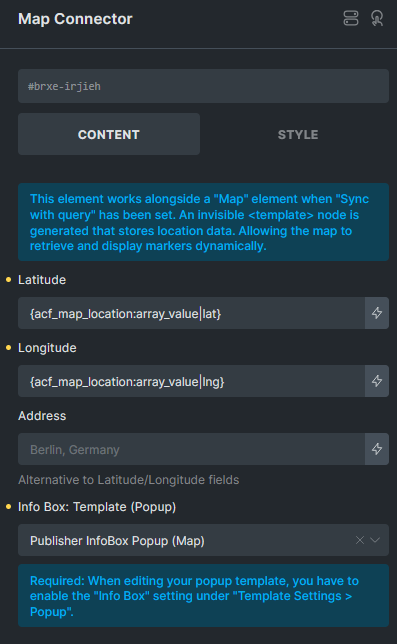
You can also define the Info Box (popup template) that should show when a marker is clicked. Make sure the selected popup template has the “Info Box (Map)” option enabled in its settings.
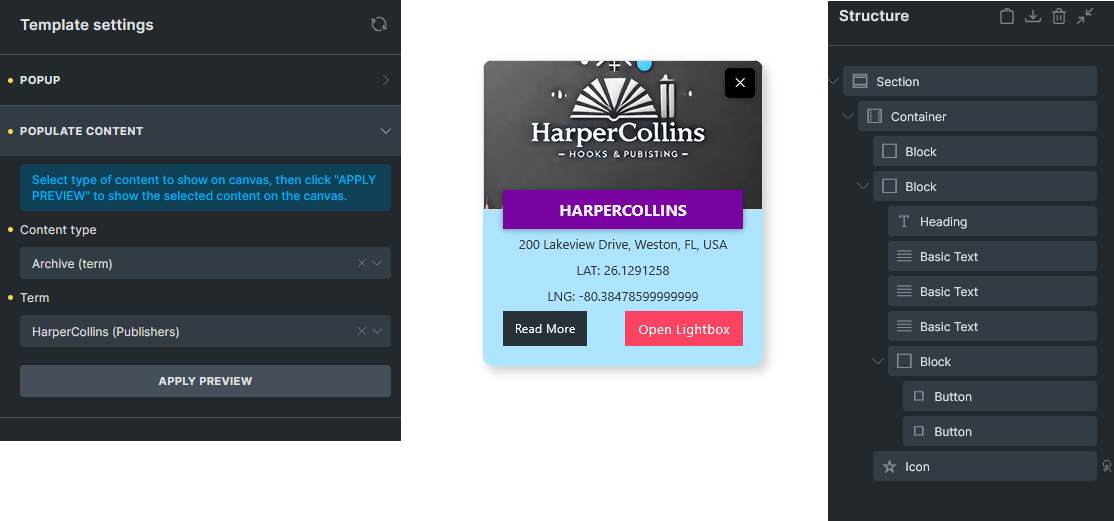
Info Box (Popup template)
Section titled “Info Box (Popup template)”Introduced in version 2.0, the Info Box (Map) option is available in Popup template settings.
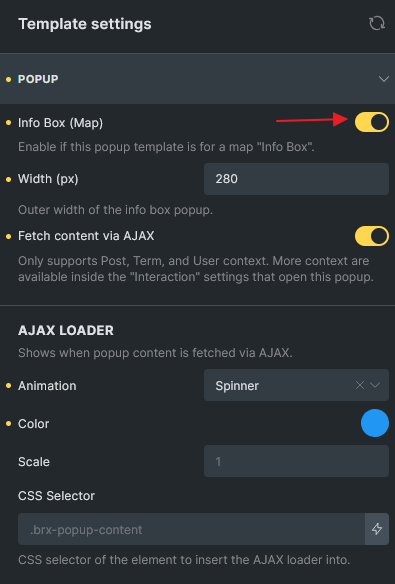
- Once enabled, the popup will display with a default width of 300px in the builder and remove the backdrop for preview.
- You can customize the design of the Info Box in the builder.
- Supports Fetch content via AJAX.
- Supports AJAX loader animation when loading dynamically.
- It is recommended to set Populate Content to the post or term being looped so dynamic data displays correctly in the builder.
Map Interactions
Section titled “Map Interactions”Two new map interaction actions are introduced in Bricks 2.0:
- Open address (Map)
- Close address (Map)
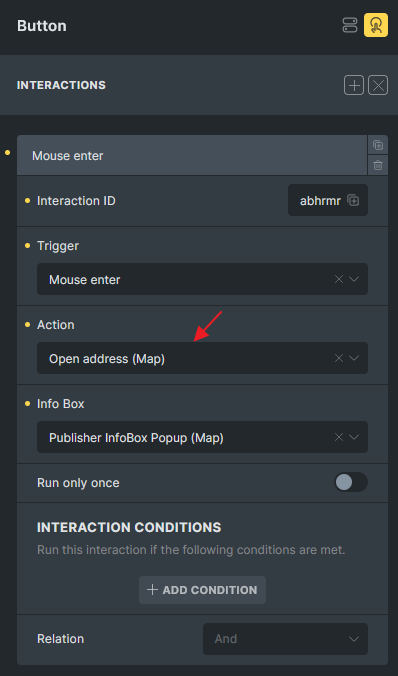
Use cases:
- Use a button or element inside the query loop to open the Info Box for the corresponding marker.
- Add a close icon inside the Info Box popup to allow users to manually close it.
These interactions provide greater control and flexibility over how Info Boxes behave in dynamic mapping scenarios.
Resolving Google Maps Script Conflicts with Other Plugins
Section titled “Resolving Google Maps Script Conflicts with Other Plugins”If you’re using a plugin like Fluent Form, which may enqueue the Google Maps script on the same page, this can result in a JavaScript conflict because the script cannot be loaded twice.
To prevent this issue, you can dequeue Bricks’ Google Maps script and trigger the bricksMap() function manually after a short delay, ensuring the Fluent Forms map script has loaded first:
add_action( 'wp_enqueue_scripts', function() {  if ( is_page( 1567 ) ) {    wp_deregister_script( 'bricks-google-maps' );  }}, 999 );
add_action( 'wp_footer', function() {  if ( is_page( 1567 ) ) {    echo '<script>      document.addEventListener("DOMContentLoaded", function() {        setTimeout(function() {          bricksMap();        }, 1000); // Adjust delay if needed      });    </script>';  }}, 999 );
Replace 1567 with your actual page ID. Adjust the delay as necessary to ensure the Fluent Forms map script has fully loaded before bricksMap() runs.
Settings
Section titled “Settings”Addresses
Section titled “Addresses”- Addresses (repeater) - Add map locations. Each address has:
- Latitude (text) - Latitude coordinate. Placeholder:
52.5164154966524. - Longitude (text) - Longitude coordinate. Placeholder:
13.377643715349544. - Address (text) - Address for geocoding (alternative to coordinates). Placeholder:
Berlin, Germany. - Info Box template (select) - Template for infobox popup.
- Title (text) - Infobox title.
- Subtitle (text) - Infobox subtitle.
- Content (textarea) - Infobox content.
- Images (image-gallery) - Images for infobox.
- Width (number) - Infobox width. Placeholder:
300. - Label (text) - Screen reader label for accessibility.
- Marker: Text (text) - Text marker content. Placeholder:
Marker. - Marker: Text (Active) (text) - Active text marker content. Placeholder:
Marker. - Marker: Image (image) - Image marker.
- Marker: Image (Active) (image) - Active image marker.
- Latitude (text) - Latitude coordinate. Placeholder:
Query loop
Section titled “Query loop”- Has loop (checkbox) - Enable query loop for dynamic addresses.
- Query (query) - Configure which posts to display.
- Info Box: Template (select) - Template for infobox popup in query loop.
Sync with query
Section titled “Sync with query”- Sync with query (query-list) - Connect to existing query loop for dynamic markers.
- Text: No results (text) - Message when no locations found. Placeholder:
No locations found.
Markers
Section titled “Markers”-
Cluster: Markers (checkbox) - Enable marker clustering.
-
Cluster: Background color (color) - Cluster background color.
-
Cluster: Text color (color) - Cluster text color.
-
Marker (separator) - Global marker settings.
-
Type (select) - Marker type. Options:
image,text. Default:image.
Marker: Text
Section titled “Marker: Text”- Max. width (number with units) - Maximum text marker width.
- Typography (typography) - Text marker font settings.
- Background color (color) - Text marker background.
- Border (border) - Text marker border styling.
- Box shadow (box-shadow) - Text marker shadow.
- Padding (spacing) - Text marker padding.
Marker: Text (Active)
Section titled “Marker: Text (Active)”- Typography (typography) - Active text marker font settings.
- Background color (color) - Active text marker background.
- Border (border) - Active text marker border styling.
- Box shadow (box-shadow) - Active text marker shadow.
- Padding (spacing) - Active text marker padding.
Marker: Image
Section titled “Marker: Image”- Marker (image) - Default marker image.
- Height (number) - Marker height in pixels. Placeholder:
40. - Width (number) - Marker width in pixels. Placeholder:
40. - Border (border) - Marker border styling.
- Box shadow (box-shadow) - Marker shadow.
Marker: Image (Active)
Section titled “Marker: Image (Active)”- Marker (Active) (image) - Active marker image.
- Height (number) - Active marker height in pixels. Placeholder:
40. - Width (number) - Active marker width in pixels. Placeholder:
40. - Border (border) - Active marker border styling.
- Box shadow (box-shadow) - Active marker shadow.
- Map ID (text) - Google Maps ID from Cloud Console for advanced features.
Map center
Section titled “Map center”- Latitude (Center) (text) - Map center latitude. Placeholder:
52.5164154966524. - Longitude (Center) (text) - Map center longitude. Placeholder:
13.377643715349544. - Address (Center) (text) - Map center address. Placeholder:
Berlin, Germany.
General settings
Section titled “General settings”- Height (number with units) - Map container height. Placeholder:
300px. - Zoom level (number) - Initial map zoom level. Range: 0-20. Placeholder:
12. - Map type (select) - Map style. Options:
roadmap,satellite,hybrid,terrain. Default:roadmap. - Map style (select) - Predefined map styles. Requires roadmap type.
- Custom map style (code) - JSON code for custom styling from Snazzy Maps.
- Apply: Custom map style (apply) - Apply custom style changes.
- Fit map on markers change (checkbox) - Auto-adjust view when markers change.
- Scroll (checkbox) - Enable scroll wheel zooming. Default: true.
- Draggable (checkbox) - Enable map dragging. Default: true.
- Fullscreen Control (checkbox) - Show fullscreen button.
- Map Type Control (checkbox) - Show map type selector.
- Street View Control (checkbox) - Show street view button. Default: true.
- Disable Default UI (checkbox) - Hide all default controls.
- Disable clickable POI (checkbox) - Disable clicking on points of interest.
- Zoom Control (checkbox) - Show zoom controls. Default: true.
- Zoom level (Min) (number) - Minimum zoom level.
- Zoom level (Max) (number) - Maximum zoom level.
No API Key Mode
Section titled “No API Key Mode”When no Google Maps API key is configured, the element falls back to Google Maps Embed API with limited functionality:
- Address (text) - Single address for embedded map. Placeholder:
Berlin, Germany. - Loading (select) - Loading behavior. Options:
eager,lazy. Default:lazy.
Was this helpful?
A quick vote and short notes help us improve these docs faster.
Leave a note for us
Please do not include passwords, license keys, or personal data. We store submitted notes to improve the docs.
Thanks for sharing feedback. We're using it to improve these docs.