
Map
The Map element in Bricks allows you to display Google Maps with a range of capabilities, from showing a single location to dynamically rendering multiple markers based on queries.
You can get started quickly by adding a Google Maps API key. Follow this guide to set it up: How to set up your Google Maps API key.
Without an API key, the Map element is still functional but limited to displaying a single marker only.
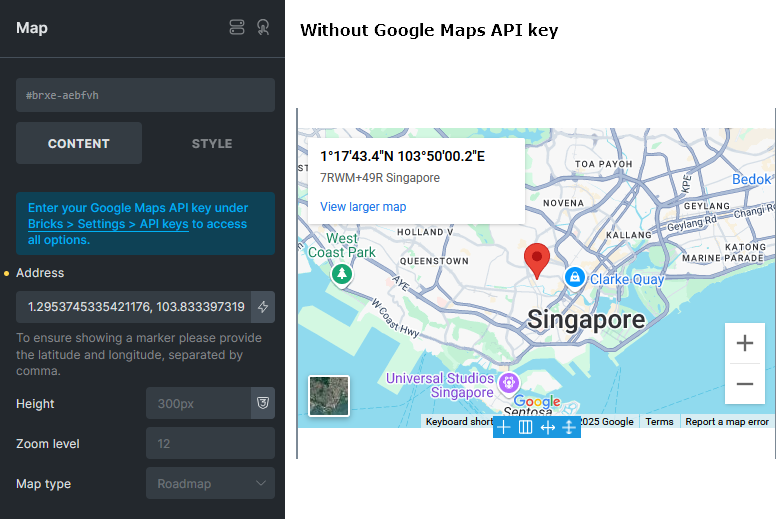
To ensure a marker is shown, simply enter a pair of coordinates (latitude and longitude, separated by a comma) in the Address field.
Choose how the map renders
Section titled “Choose how the map renders”With an API key saved, Render mode lets you choose Google Maps JavaScript API (the default) or Iframe embed. Use Iframe embed when the map only needs a single address and you do not need API-only features such as multiple markers, clustering, query syncing, or custom Info Boxes. The iframe mode does not load the Google Maps JavaScript API for that map. Set its Loading option to lazy (the default) or eager.
Without an API key, the map uses the single-address iframe mode automatically. The Render mode selector appears only when an API key is saved.
Displaying multiple addresses
Section titled “Displaying multiple addresses”To unlock advanced features such as multiple locations, clustering, and custom Info Boxes, save a valid Google Maps API key and use the Google Maps JavaScript API render mode. You will then see more controls on the element.
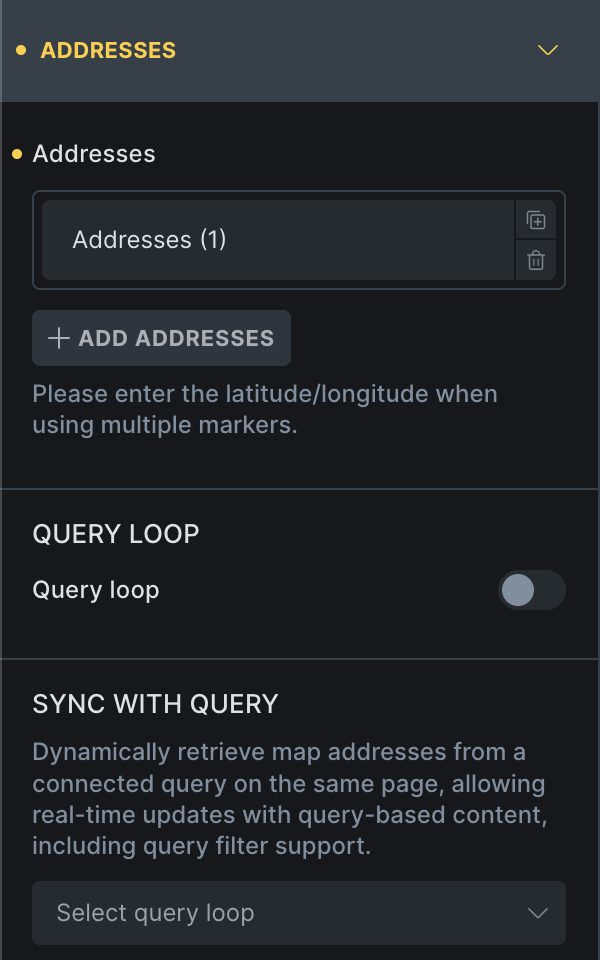
Bricks supports three address input modes:
1) Static
Section titled “1) Static”Manually define multiple locations using the “Addresses” Repeater control of the Map element. This mode supports only the default Google Maps Info Box.
2) Query loop
Section titled “2) Query loop”Use this mode to populate map markers with addresses or coordinates from a query.
For example, if you have a custom post type like “Properties” where each property contains an address, enabling the Query loop allows you to show markers of all property addresses on the map. (@since 2.0)
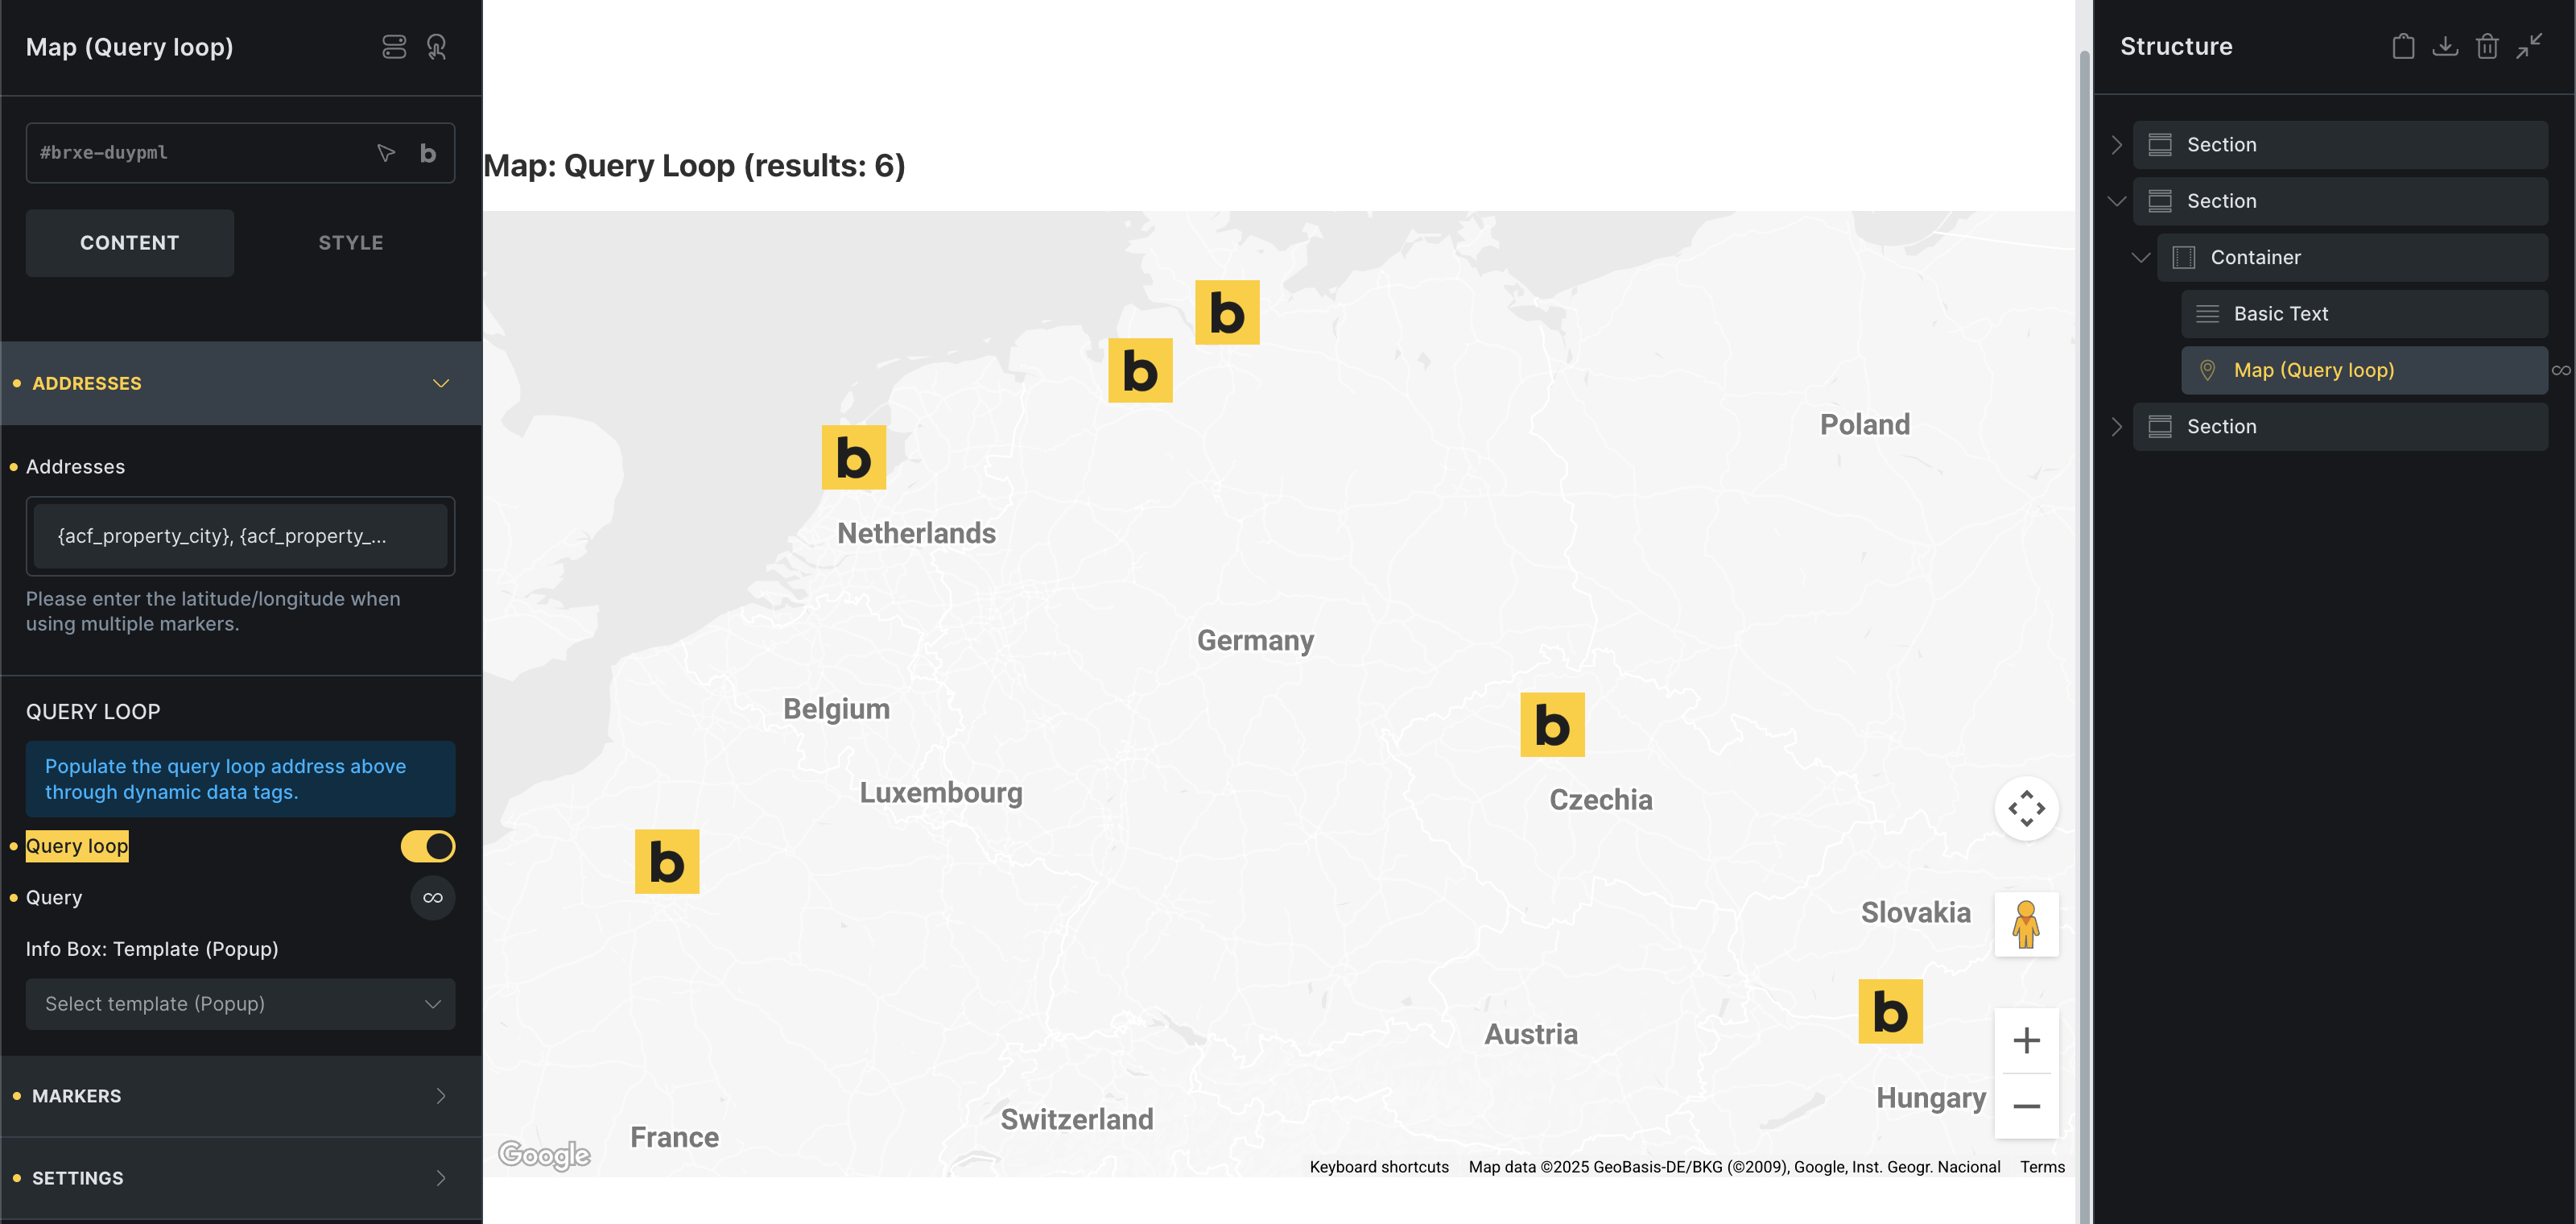
You can also define a custom Info Box using a popup template.
In our example above, we selected the custom post type property, where each address is stored in a custom field (ACF). Providing the latitude & longitude coordinates will be more accurate than a physical address.
The map’s own query only populates markers. To update markers through filters, pagination, or Load More, use a separate results loop containing Map Connectors and sync the map to it.
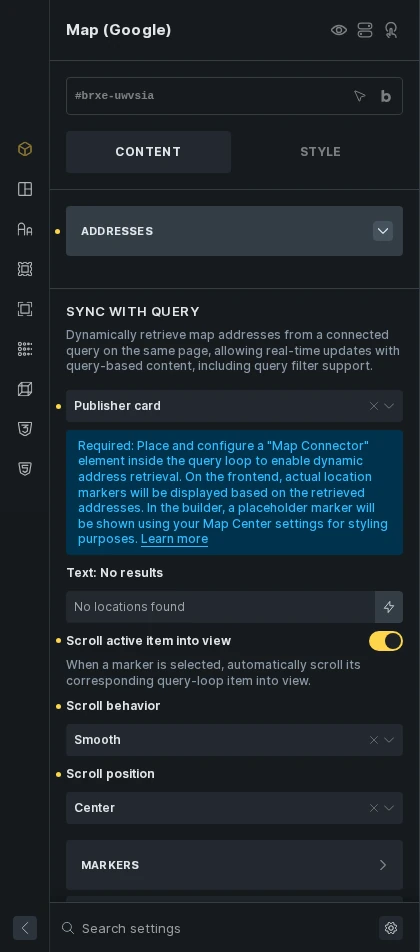
3) Sync with query
Section titled “3) Sync with query”Ideal for use cases where the map is shown alongside a dynamic query loop such as a directory, Sync with query allows the map to update live with the query as users interact via AJAX Pagination, Load More, or Query Filters.
This mode requires adding a Map Connector element inside the target query loop. Point filters, pagination, Load More, and any results summary at that loop.
The builder previews the connected loop’s markers. Test filtering and pagination on the frontend. Map (Leaflet) also supports this workflow.
It also supports custom Info Boxes using popup templates.
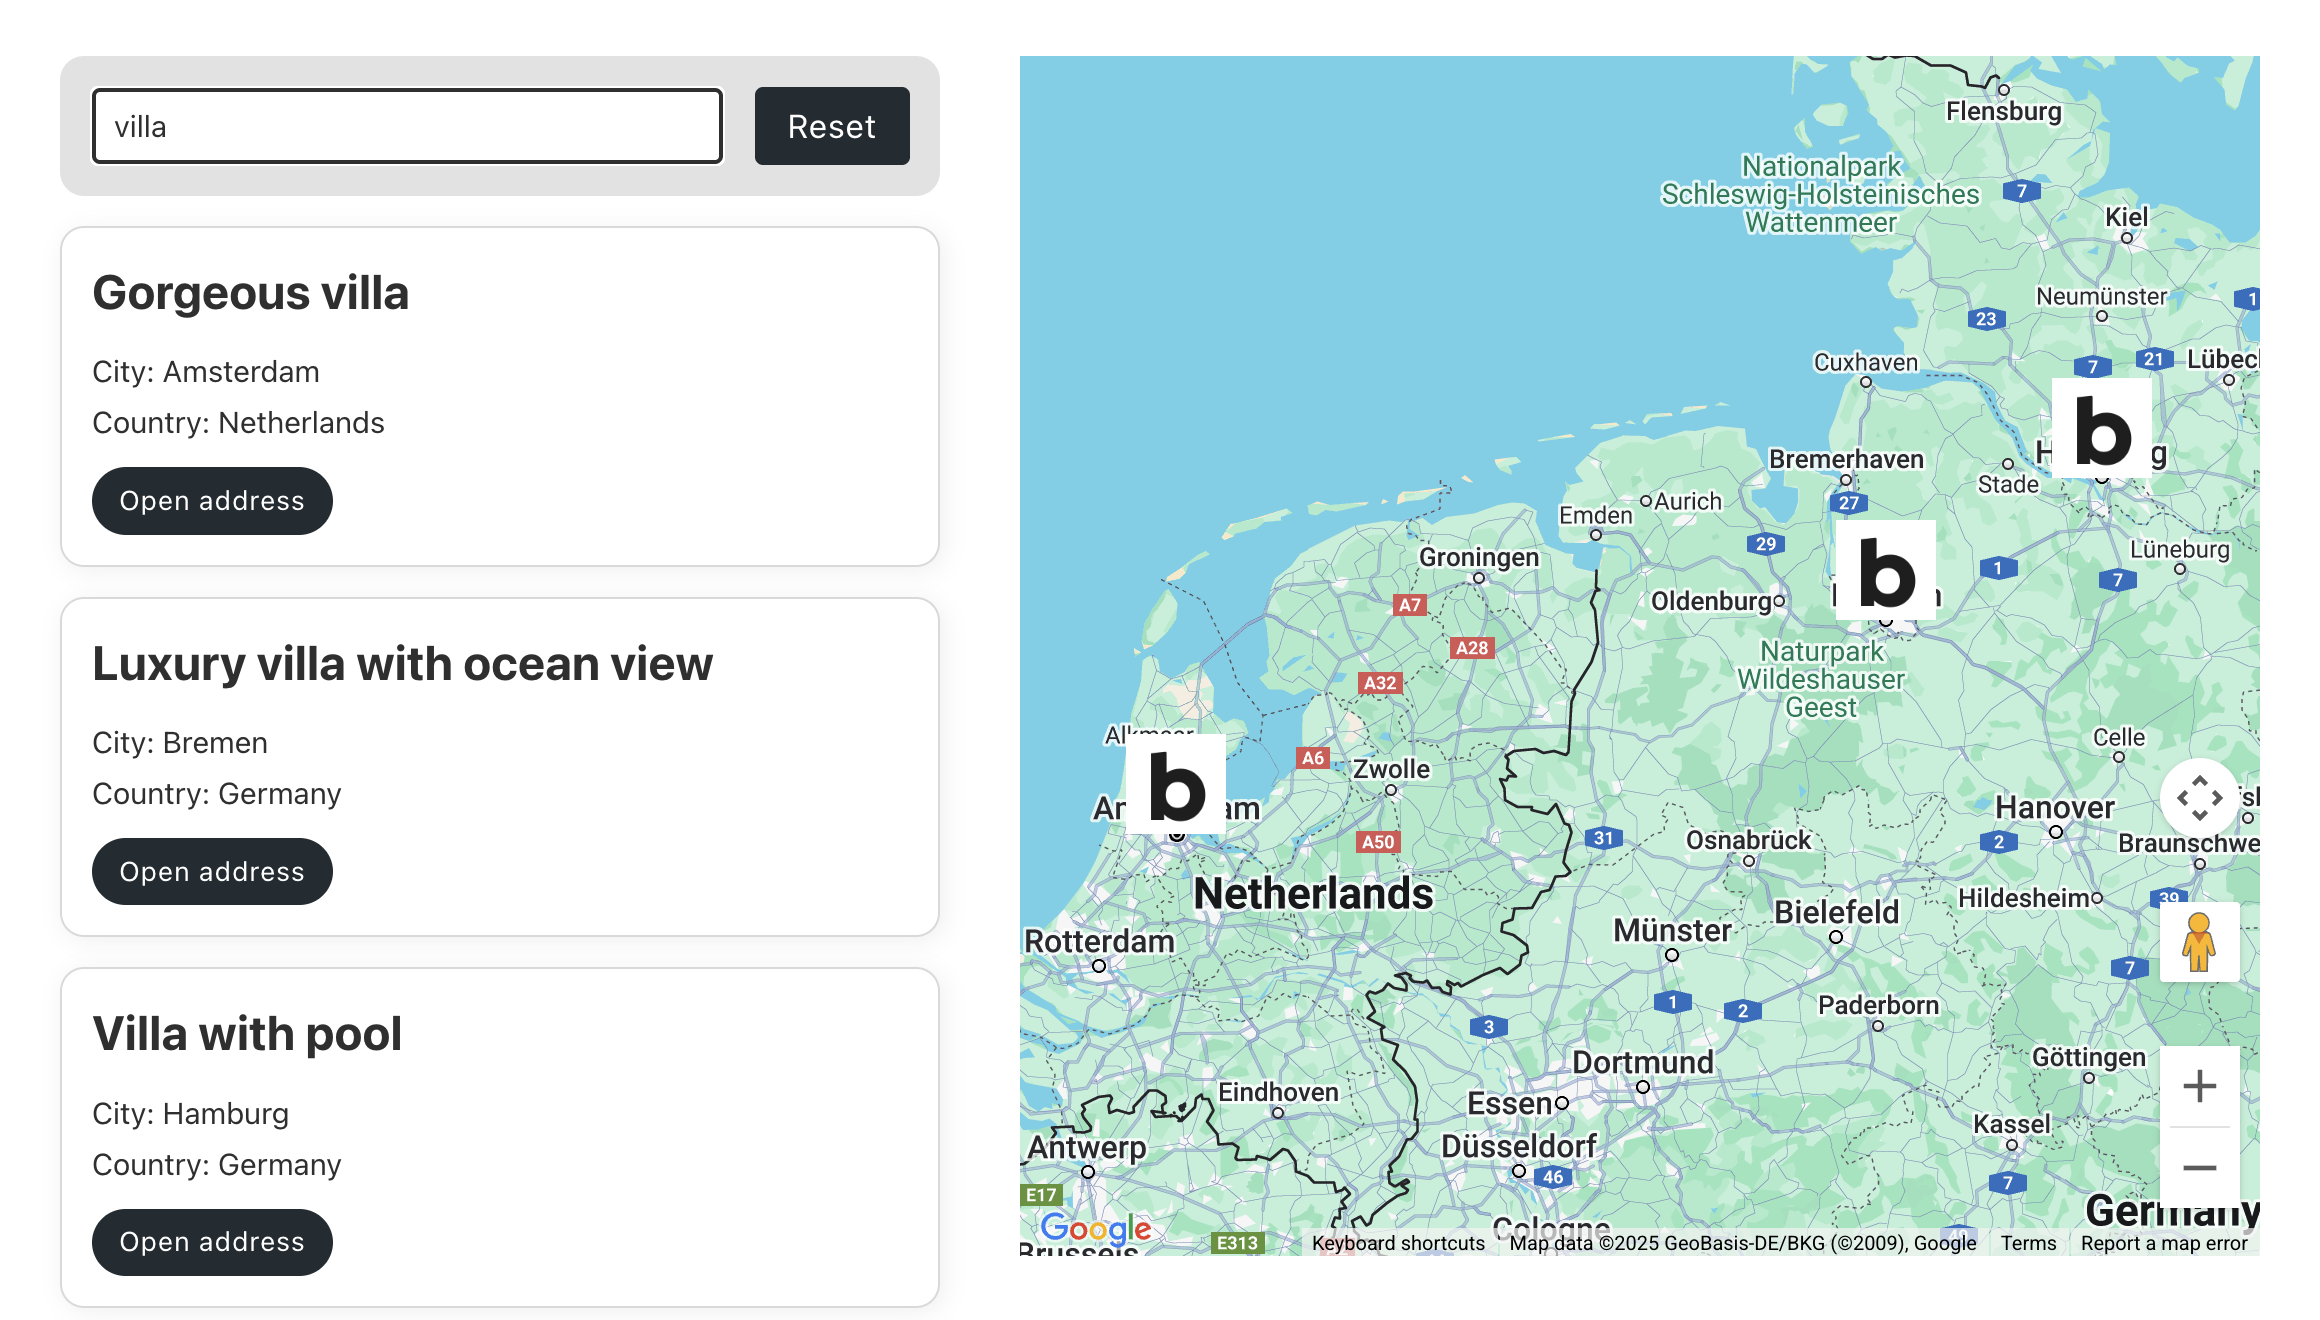
Example setup: You want to display a query loop on the same page as your map and connect the two. If this query loop uses AJAX Pagination, Query Filters, or Load More, enabling Sync with query allows the map markers to update dynamically in real-time as users interact with those features.
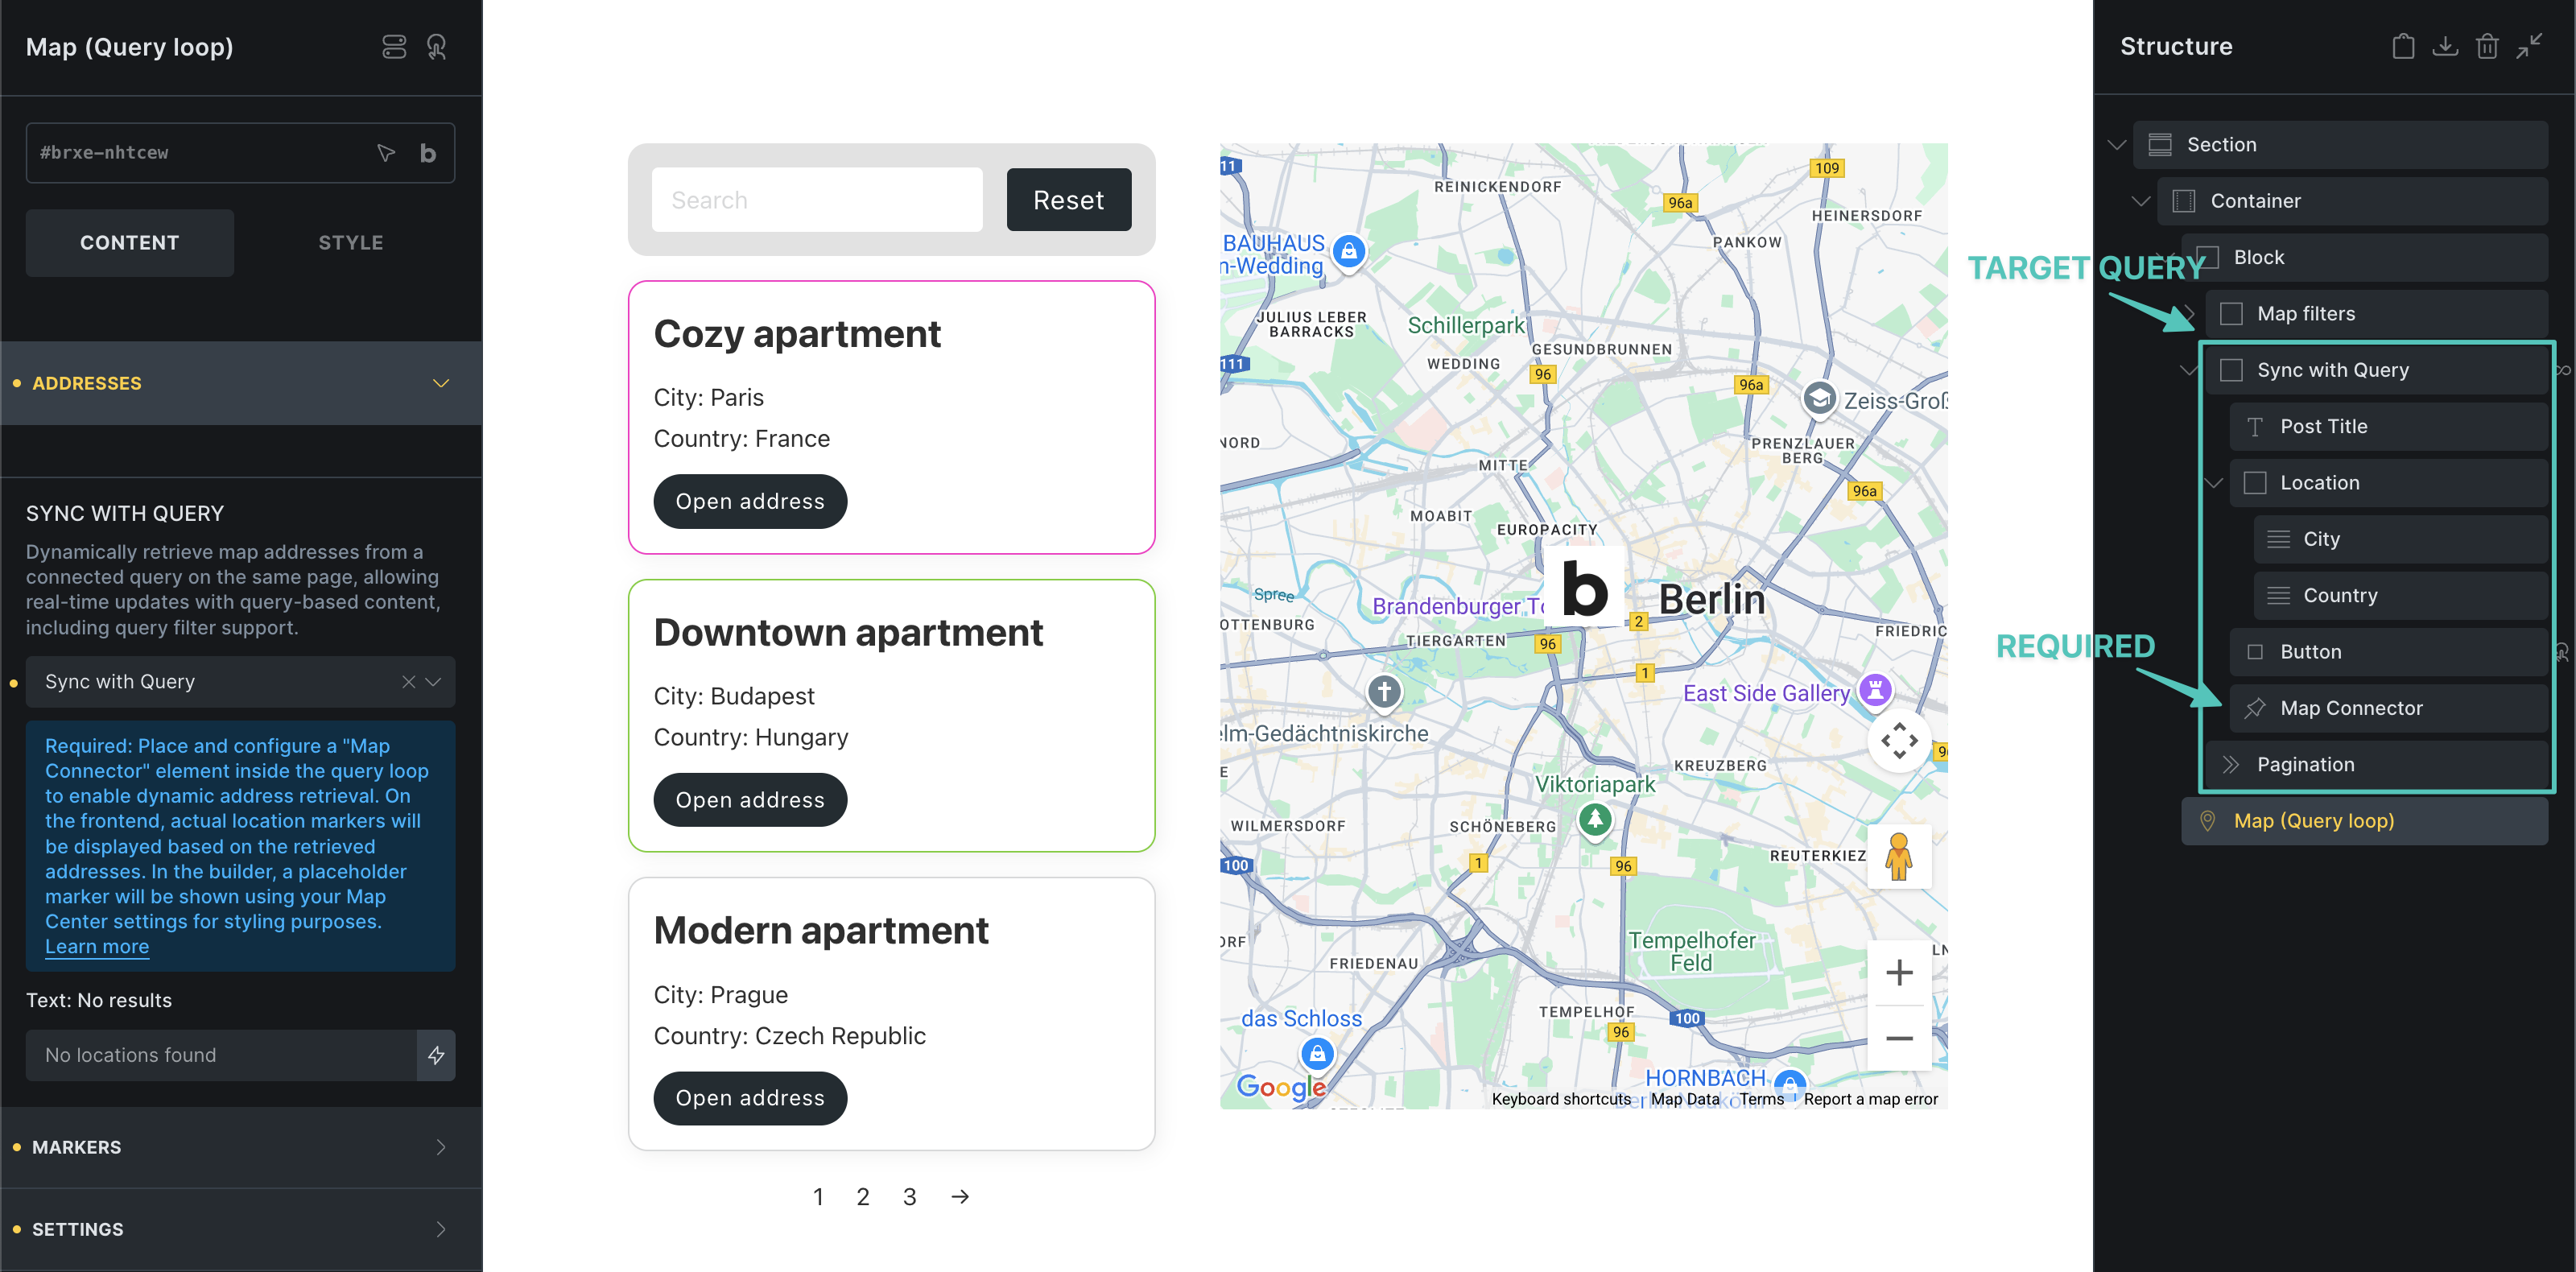
Map markers update according to query results:
Geolocation filtering
Section titled “Geolocation filtering”Starting with Bricks 2.5, use a Filter - Geolocation to search the connected listing within a radius of an address, device location, or map center. Target a Posts, Terms, or Users results loop containing Map Connectors, and select the same loop under Addresses > Sync with query. The map must use Google Maps JavaScript API rendering. Static maps and the map’s own query are not filter targets.
The filter reads saved coordinates from its configured data source. It does not geocode stored street addresses during indexing. Use matching location fields on the Map Connectors.
One matching Geolocation filter and one synchronized map connect automatically. If several filters or maps use the query, select Map (Optional) on the filter. Each filter connects to one map, and each map can be controlled by one filter.
The map shows the applied search origin and radius, including searches with no matching locations. Configure the origin marker and circle on the filter. Address search requires Maps JavaScript API and Geocoding API; autocomplete additionally requires Places API (New).
Enable Search on map drag on the filter to use the map center after the visitor finishes panning. Dragging must be enabled on the map. Visitor controlled mode displays a Search as I move the map checkbox; Automatic mode searches after every qualifying drag. Zooming alone does not trigger a search. Apply on: On submit stages the new location until submitted.
Under Addresses, use No results text, No results typography, and No results position to configure the empty-state message. Position it at the top or bottom to keep the origin marker visible.
Scroll the Active Item Into View
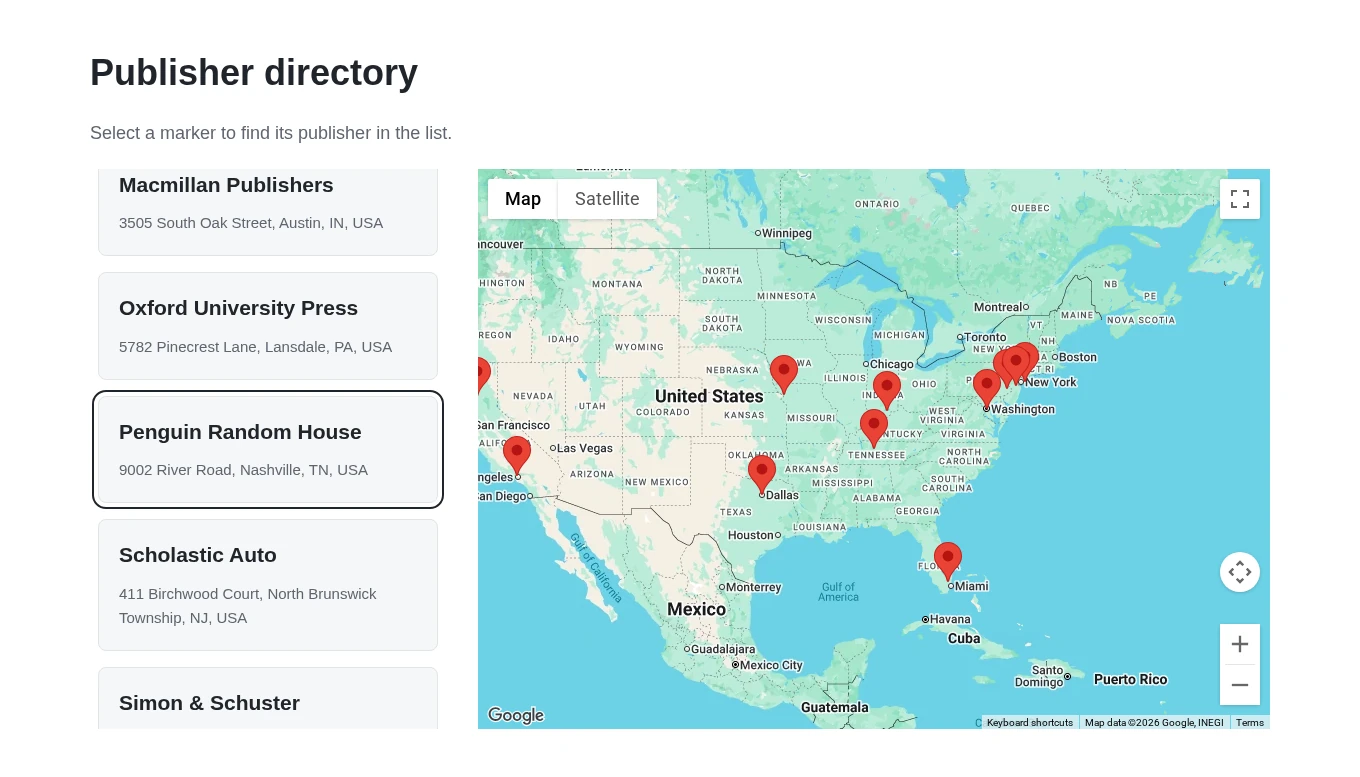
Section titled “Scroll the Active Item Into View”Starting with Bricks 2.5, selecting a marker can scroll its connected query-loop item into view. This works when clicking a marker or selecting it through an Open address (Map) interaction, including markers without an Info Box.
- Save a Google Maps API key and use Google Maps JavaScript API render mode.
- Add a Map Connector inside the target query loop and configure its location data.
- On the Map element, select the loop under Addresses > Sync with query.
- Enable Scroll active item into view. It is off by default.
- Choose the scrolling behavior and position, then save and test the frontend.
| Setting | Options |
|---|---|
| Scroll behavior | Follow site setting (default) uses the scroll container’s or page’s CSS scroll behavior. Smooth animates scrolling. Instant scrolls immediately. |
| Scroll position | Nearest (default) moves only as far as needed to bring the item into view. Start aligns its top with the scroll area. Center centers it vertically. |
Bricks finds the connected loop item automatically and scrolls its nearest vertically scrollable parent. If there is no such parent, it scrolls the page. You do not need an interaction on each result, a target selector, or a scroll-container selector. With Nearest, an item already visible, or an oversized item spanning the scroll area, stays in place.
Markers
Section titled “Markers”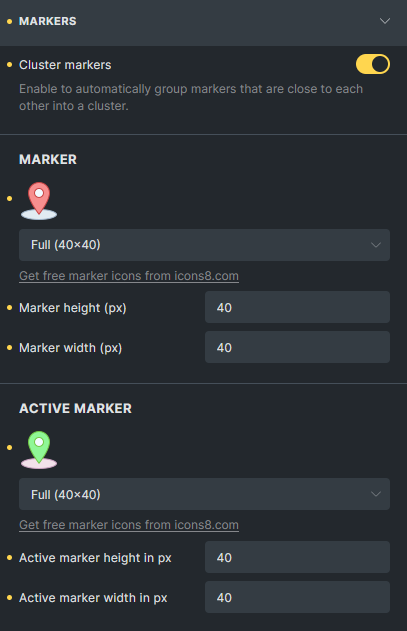
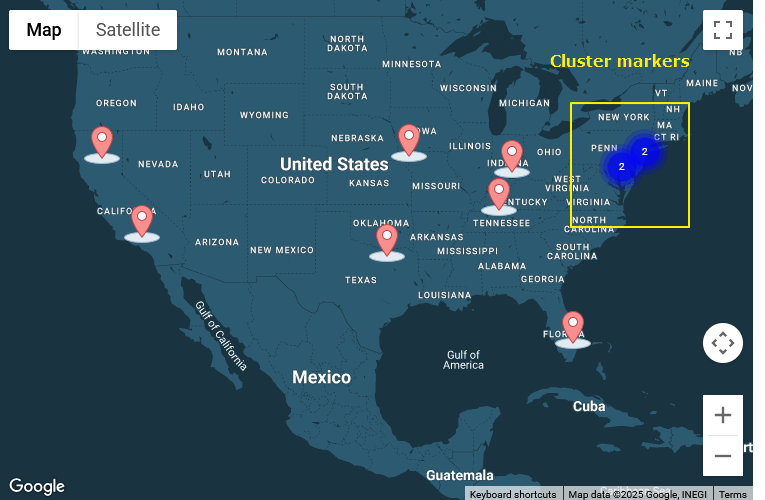
Cluster markers
Section titled “Cluster markers”Enable this option to automatically group nearby markers into a cluster. (@since 2.0)
General Settings
Section titled “General Settings”Map ID
Section titled “Map ID”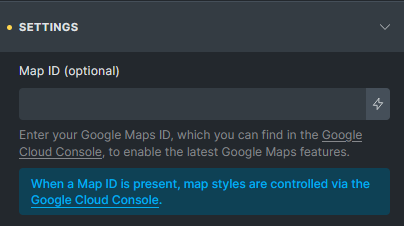
Enter your Google Maps ID (available in your Google Cloud Console) to enable the latest Maps features (@since 2.0)
When set:
- Bricks uses Google’s modern
AdvancedMarkerAPI. - Map styles are managed via your Google Console (style settings in Bricks are disabled).
- Deprecated browser console warnings are avoided.
Map Center
Section titled “Map Center”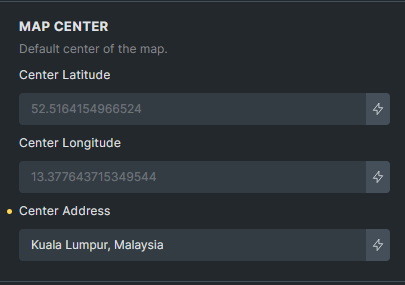
Set the default center point of the map. With Sync with query, AJAX updates preserve the current view unless Fit map on markers change is enabled. When fitting is enabled and no locations remain, the map returns to its configured center and zoom. An active Geolocation search preserves its search origin and radius when there are no results.
Initial view and marker updates
Section titled “Initial view and marker updates”By default, the initial view centers a single marker at the configured zoom or fits multiple markers. Enable Disable initial fit map to retain the configured center and zoom on page load.
Fit map on markers change separately controls whether the view adjusts after synced-query updates. It is off by default.
Others
Section titled “Others”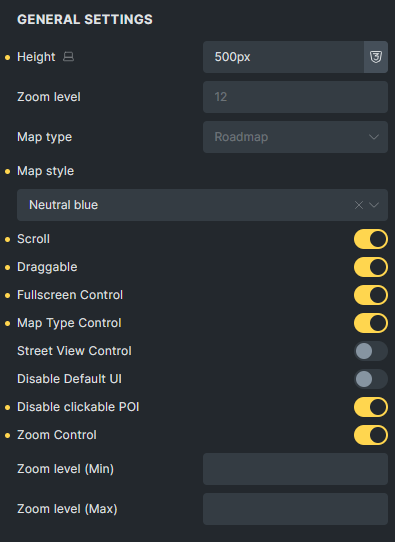
Map Connector (element)
Section titled “Map Connector (element)”The Map Connector element (@since 2.0) is required when using Sync with query.
Place it inside the target query loop that you want to sync with your map. It generates an invisible <template> node containing location data, which is then read by the map to dynamically render the markers.
Note: It’s strongly recommended to provide latitude and longitude values whenever available. If you rely solely on addresses and require geocoding every time markers are rendered, you may incur charges from the Google Maps Platform Geocoding API.
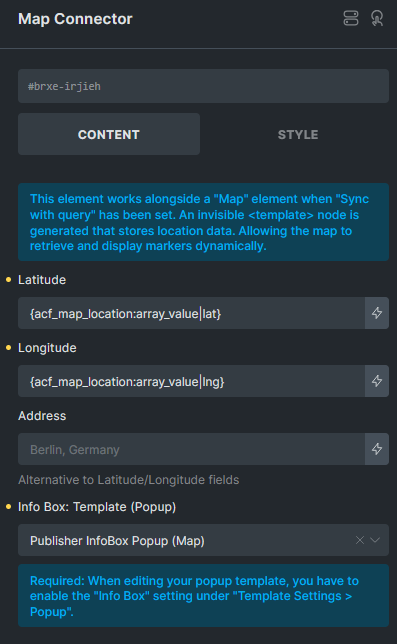
You can also define the Info Box (popup template) that should show when a marker is clicked. Make sure the selected popup template has the “Info Box (Map)” option enabled in its settings.
Info Box (Popup template)
Section titled “Info Box (Popup template)”Introduced in version 2.0, the Info Box (Map) option is available in Popup template settings.
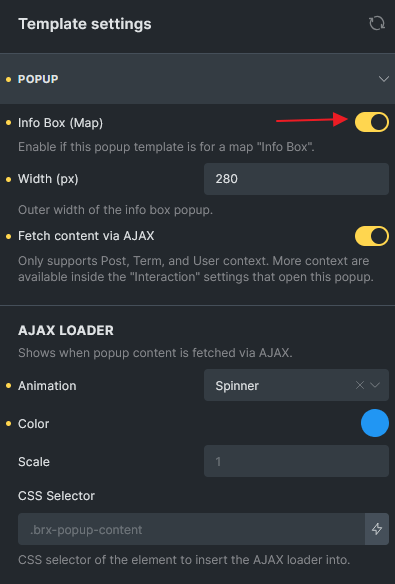
- Once enabled, the popup will display with a default width of 300px in the builder and remove the backdrop for preview.
- You can customize the design of the Info Box in the builder.
- Supports Fetch content via AJAX.
- Supports AJAX loader animation when loading dynamically.
- It is recommended to set Populate Content to the post or term being looped so dynamic data displays correctly in the builder.
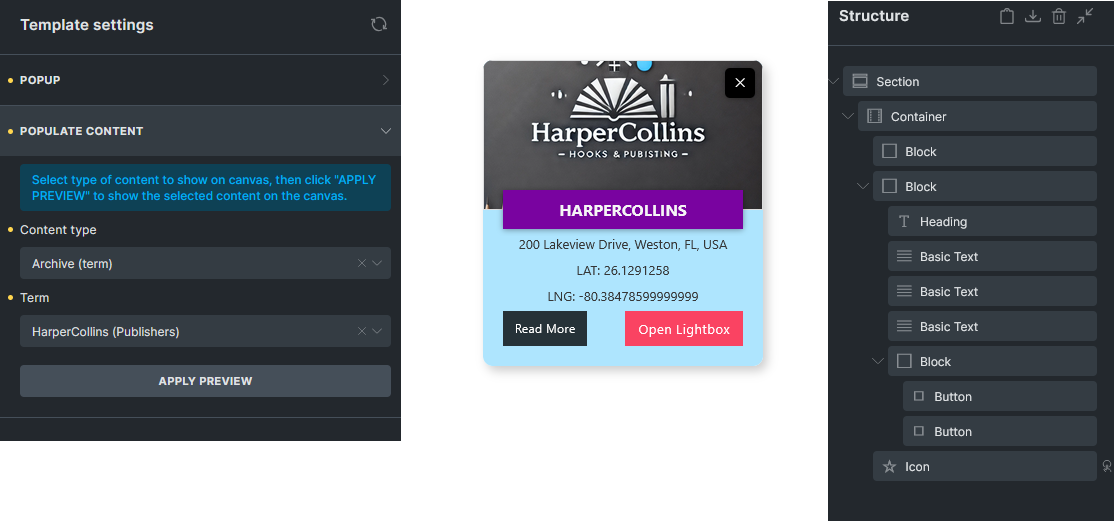
Map Interactions
Section titled “Map Interactions”Two new map interaction actions are introduced in Bricks 2.0:
- Open address (Map)
- Close address (Map)
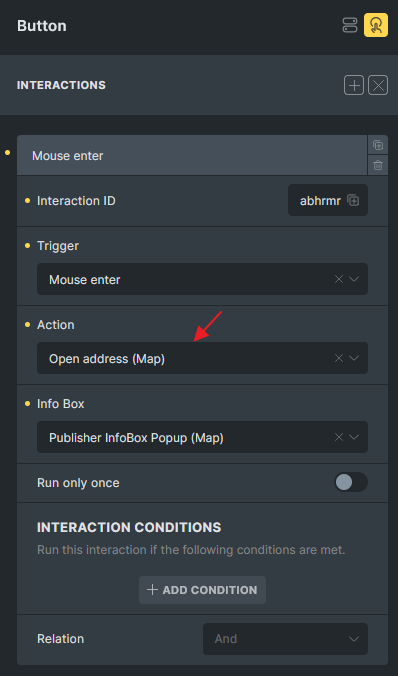
Use cases:
- Use a button or element inside the query loop to open the Info Box for the corresponding marker.
- Add a close icon inside the Info Box popup to allow users to manually close it.
These interactions provide greater control and flexibility over how Info Boxes behave in dynamic mapping scenarios.
When an Info Box opens, Bricks adds the infobox-opened class to the interaction elements associated with that marker. The class is removed when the Info Box closes. You can use this class to style the open state or a parent element that contains the interaction element:
.looping-div:has(.infobox-opened) { background-color: blue;}Style the Active Connected Item
Section titled “Style the Active Connected Item”Starting with Bricks 2.5, Bricks adds map-marker-active to the Map Connector associated with the selected marker. The class updates when a marker is clicked or selected through Open address (Map), even if the marker has no Info Box. Bricks removes it when another marker is selected or the marker state is reset, including when query updates rebuild the markers.
Because the connector is an invisible <template> node, style the visible loop item that contains it. For example, assign the property-card class to the repeated card and add:
.property-card:has(.map-marker-active) { outline: 2px solid currentColor; outline-offset: 4px;}The active connector class and Scroll active item into view work independently. Use map-marker-active to style the selected location’s card. Continue using infobox-opened on interaction elements for the Info Box’s open/close state.
Resolving Google Maps Script Conflicts with Other Plugins
Section titled “Resolving Google Maps Script Conflicts with Other Plugins”Starting with Bricks 2.5, Bricks reuses a Google Maps API runtime that another integration has loaded or is loading. It preserves that integration’s key, language, and callbacks. A manual script-dequeue workaround is usually unnecessary.
If the map or address search fails, check that the key used by the shared Google loader permits the APIs your page needs. A key configured by another plugin can have different service or website restrictions from the key saved in Bricks. Consent tools and script optimizers can also control when Google becomes available.
After upgrading, review custom code that deregisters bricks-google-maps or starts the map on a fixed timer. Test the map and address search together on the frontend before removing an existing workaround.
Settings
Section titled “Settings”Addresses
Section titled “Addresses”- Addresses (repeater) - Add map locations. Each address has:
- Latitude (text) - Latitude coordinate. Placeholder:
52.5164154966524. - Longitude (text) - Longitude coordinate. Placeholder:
13.377643715349544. - Address (text) - Address for geocoding (alternative to coordinates). Placeholder:
Berlin, Germany. - Info Box template (select) - Template for infobox popup.
- Title (text) - Infobox title.
- Subtitle (text) - Infobox subtitle.
- Content (textarea) - Infobox content.
- Images (image-gallery) - Images for infobox.
- Width (number) - Infobox width. Placeholder:
300. - Label (text) - Screen reader label for accessibility.
- Marker: Text (text) - Text marker content. Placeholder:
Marker. - Marker: Text (Active) (text) - Active text marker content. Placeholder:
Marker. - Marker: Image (image) - Image marker.
- Marker: Image (Active) (image) - Active image marker.
- Latitude (text) - Latitude coordinate. Placeholder:
Query loop
Section titled “Query loop”- Has loop (checkbox) - Enable query loop for dynamic addresses.
- Query (query) - Configure which posts to display.
- Info Box: Template (select) - Template for infobox popup in query loop.
Sync with query
Section titled “Sync with query”- Sync with query (query-list) - Connect to existing query loop for dynamic markers.
- Text: No results (text) - Message when no locations found. Placeholder:
No locations found. - Scroll active item into view (checkbox, Bricks 2.5) - Scroll to the connected loop item when its marker is selected. Off by default. Requires a selected query and JavaScript API rendering.
- Scroll behavior (select) - Follow site setting (default), Smooth, or Instant. Available when scrolling is enabled.
- Scroll position (select) - Nearest (default), Start, or Center. Available when scrolling is enabled.
Markers
Section titled “Markers”-
Cluster: Markers (checkbox) - Enable marker clustering.
-
Cluster: Background color (color) - Cluster background color.
-
Cluster: Text color (color) - Cluster text color.
-
Marker (separator) - Global marker settings.
-
Type (select) - Marker type. Options:
image,text. Default:image.
Marker: Text
Section titled “Marker: Text”- Max. width (number with units) - Maximum text marker width.
- Typography (typography) - Text marker font settings.
- Background color (color) - Text marker background.
- Border (border) - Text marker border styling.
- Box shadow (box-shadow) - Text marker shadow.
- Padding (spacing) - Text marker padding.
Marker: Text (Active)
Section titled “Marker: Text (Active)”- Typography (typography) - Active text marker font settings.
- Background color (color) - Active text marker background.
- Border (border) - Active text marker border styling.
- Box shadow (box-shadow) - Active text marker shadow.
- Padding (spacing) - Active text marker padding.
Marker: Image
Section titled “Marker: Image”- Marker (image) - Default marker image.
- Height (number) - Marker height in pixels. Placeholder:
40. - Width (number) - Marker width in pixels. Placeholder:
40. - Border (border) - Marker border styling.
- Box shadow (box-shadow) - Marker shadow.
Marker: Image (Active)
Section titled “Marker: Image (Active)”- Marker (Active) (image) - Active marker image.
- Height (number) - Active marker height in pixels. Placeholder:
40. - Width (number) - Active marker width in pixels. Placeholder:
40. - Border (border) - Active marker border styling.
- Box shadow (box-shadow) - Active marker shadow.
- Map ID (text) - Google Maps ID from Cloud Console for advanced features.
- Render mode (select) - With an API key saved, choose Google Maps JavaScript API or Iframe embed. Default: Google Maps JavaScript API.
- Loading (select) - For iframe rendering, choose
lazyoreager. Default:lazy.
Map center
Section titled “Map center”- Latitude (Center) (text) - Map center latitude. Placeholder:
52.5164154966524. - Longitude (Center) (text) - Map center longitude. Placeholder:
13.377643715349544. - Address (Center) (text) - Map center address. Placeholder:
Berlin, Germany.
General settings
Section titled “General settings”- Height (number with units) - Map container height. Placeholder:
300px. - Zoom level (number) - Initial map zoom level. Range: 0-20. Placeholder:
12. - Map type (select) - Map style. Options:
roadmap,satellite,hybrid,terrain. Default:roadmap. - Map style (select) - Predefined map styles. Requires roadmap type.
- Custom map style (code) - JSON code for custom styling from Snazzy Maps.
- Apply: Custom map style (apply) - Apply custom style changes.
- Disable initial fit map (checkbox) - Preserve the configured center and zoom on page load. Off by default.
- Fit map on markers change (checkbox) - Adjust the view after synced query results change. Off by default.
- Scroll (checkbox) - Enable scroll wheel zooming. Default: true.
- Draggable (checkbox) - Enable map dragging. Default: true.
- Fullscreen Control (checkbox) - Show fullscreen button.
- Map Type Control (checkbox) - Show map type selector.
- Street View Control (checkbox) - Show street view button. Default: true.
- Disable Default UI (checkbox) - Hide all default controls.
- Disable clickable POI (checkbox) - Disable clicking on points of interest.
- Zoom Control (checkbox) - Show zoom controls. Default: true.
- Zoom level (Min) (number) - Minimum zoom level.
- Zoom level (Max) (number) - Maximum zoom level.
No API Key Mode
Section titled “No API Key Mode”When no Google Maps API key is configured, the element falls back to Google Maps Embed API with limited functionality:
- Address (text) - Single address for embedded map. Placeholder:
Berlin, Germany. - Loading (select) - Loading behavior. Options:
eager,lazy. Default:lazy.
Was this helpful?
A quick vote and short notes help us improve these docs faster.
Leave a note for us
Please do not include passwords, license keys, or personal data. We store submitted notes to improve the docs.
Thanks for sharing feedback. We're using it to improve these docs.