
AI Abilities and Skills
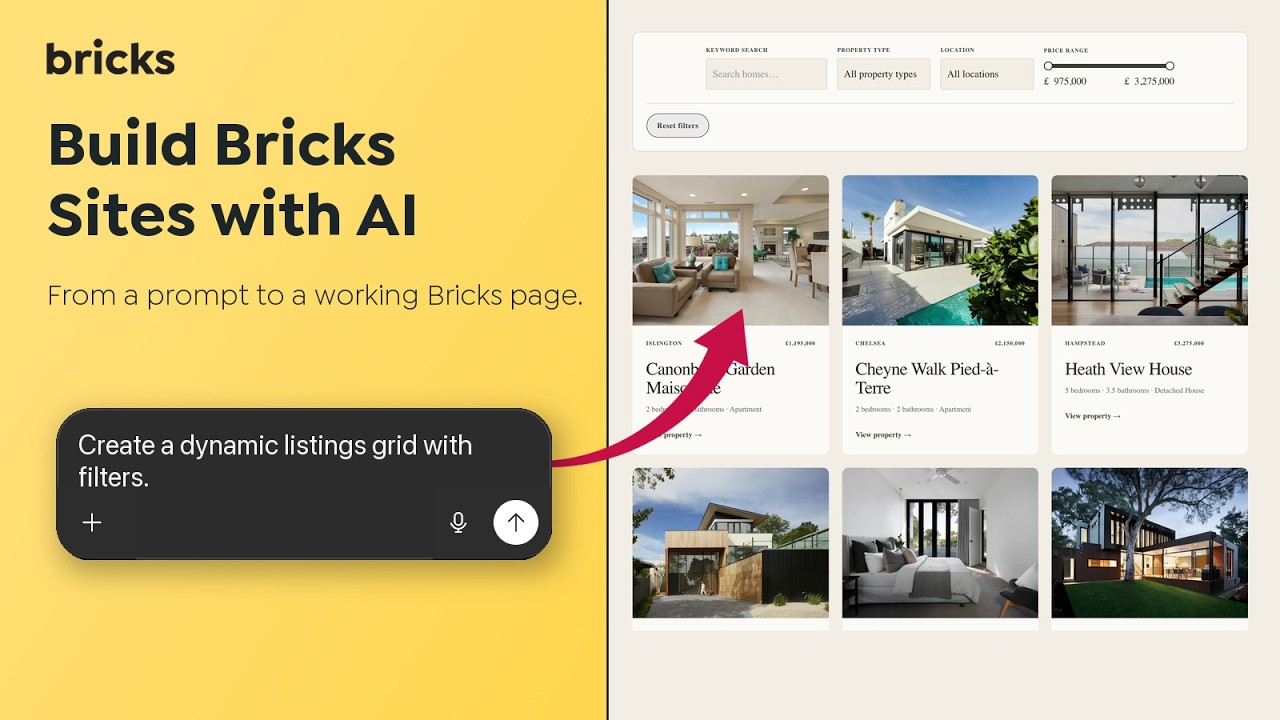
Bricks 2.4 introduces experimental AI abilities for Bricks. Abilities are actions registered with the WordPress Abilities API that an AI agent can run through an MCP-compatible client. Developers can also inspect and run the same registered abilities from WP-CLI when the wp ability command is available.
With abilities enabled, a connected agent can read and update parts of a Bricks site: design system, templates, elements, dynamic data, media, WooCommerce templates, and revisions.
Bricks skills are optional companion instructions for AI clients that support skills, rules, or reusable project guidance. They do not add new site permissions or new Bricks actions. They teach the agent how to work with Bricks more carefully, for example when to inspect the existing design system, avoid duplicate classes or variables, preview before saving, and choose the right ability for the task.
Use Bricks > AI to set up the MCP connection, choose which abilities are available on the site, create credentials, and install optional Bricks skills.
Where to find it
Section titled “Where to find it”Visit the Bricks > AI screen in your WordPress dashboard.
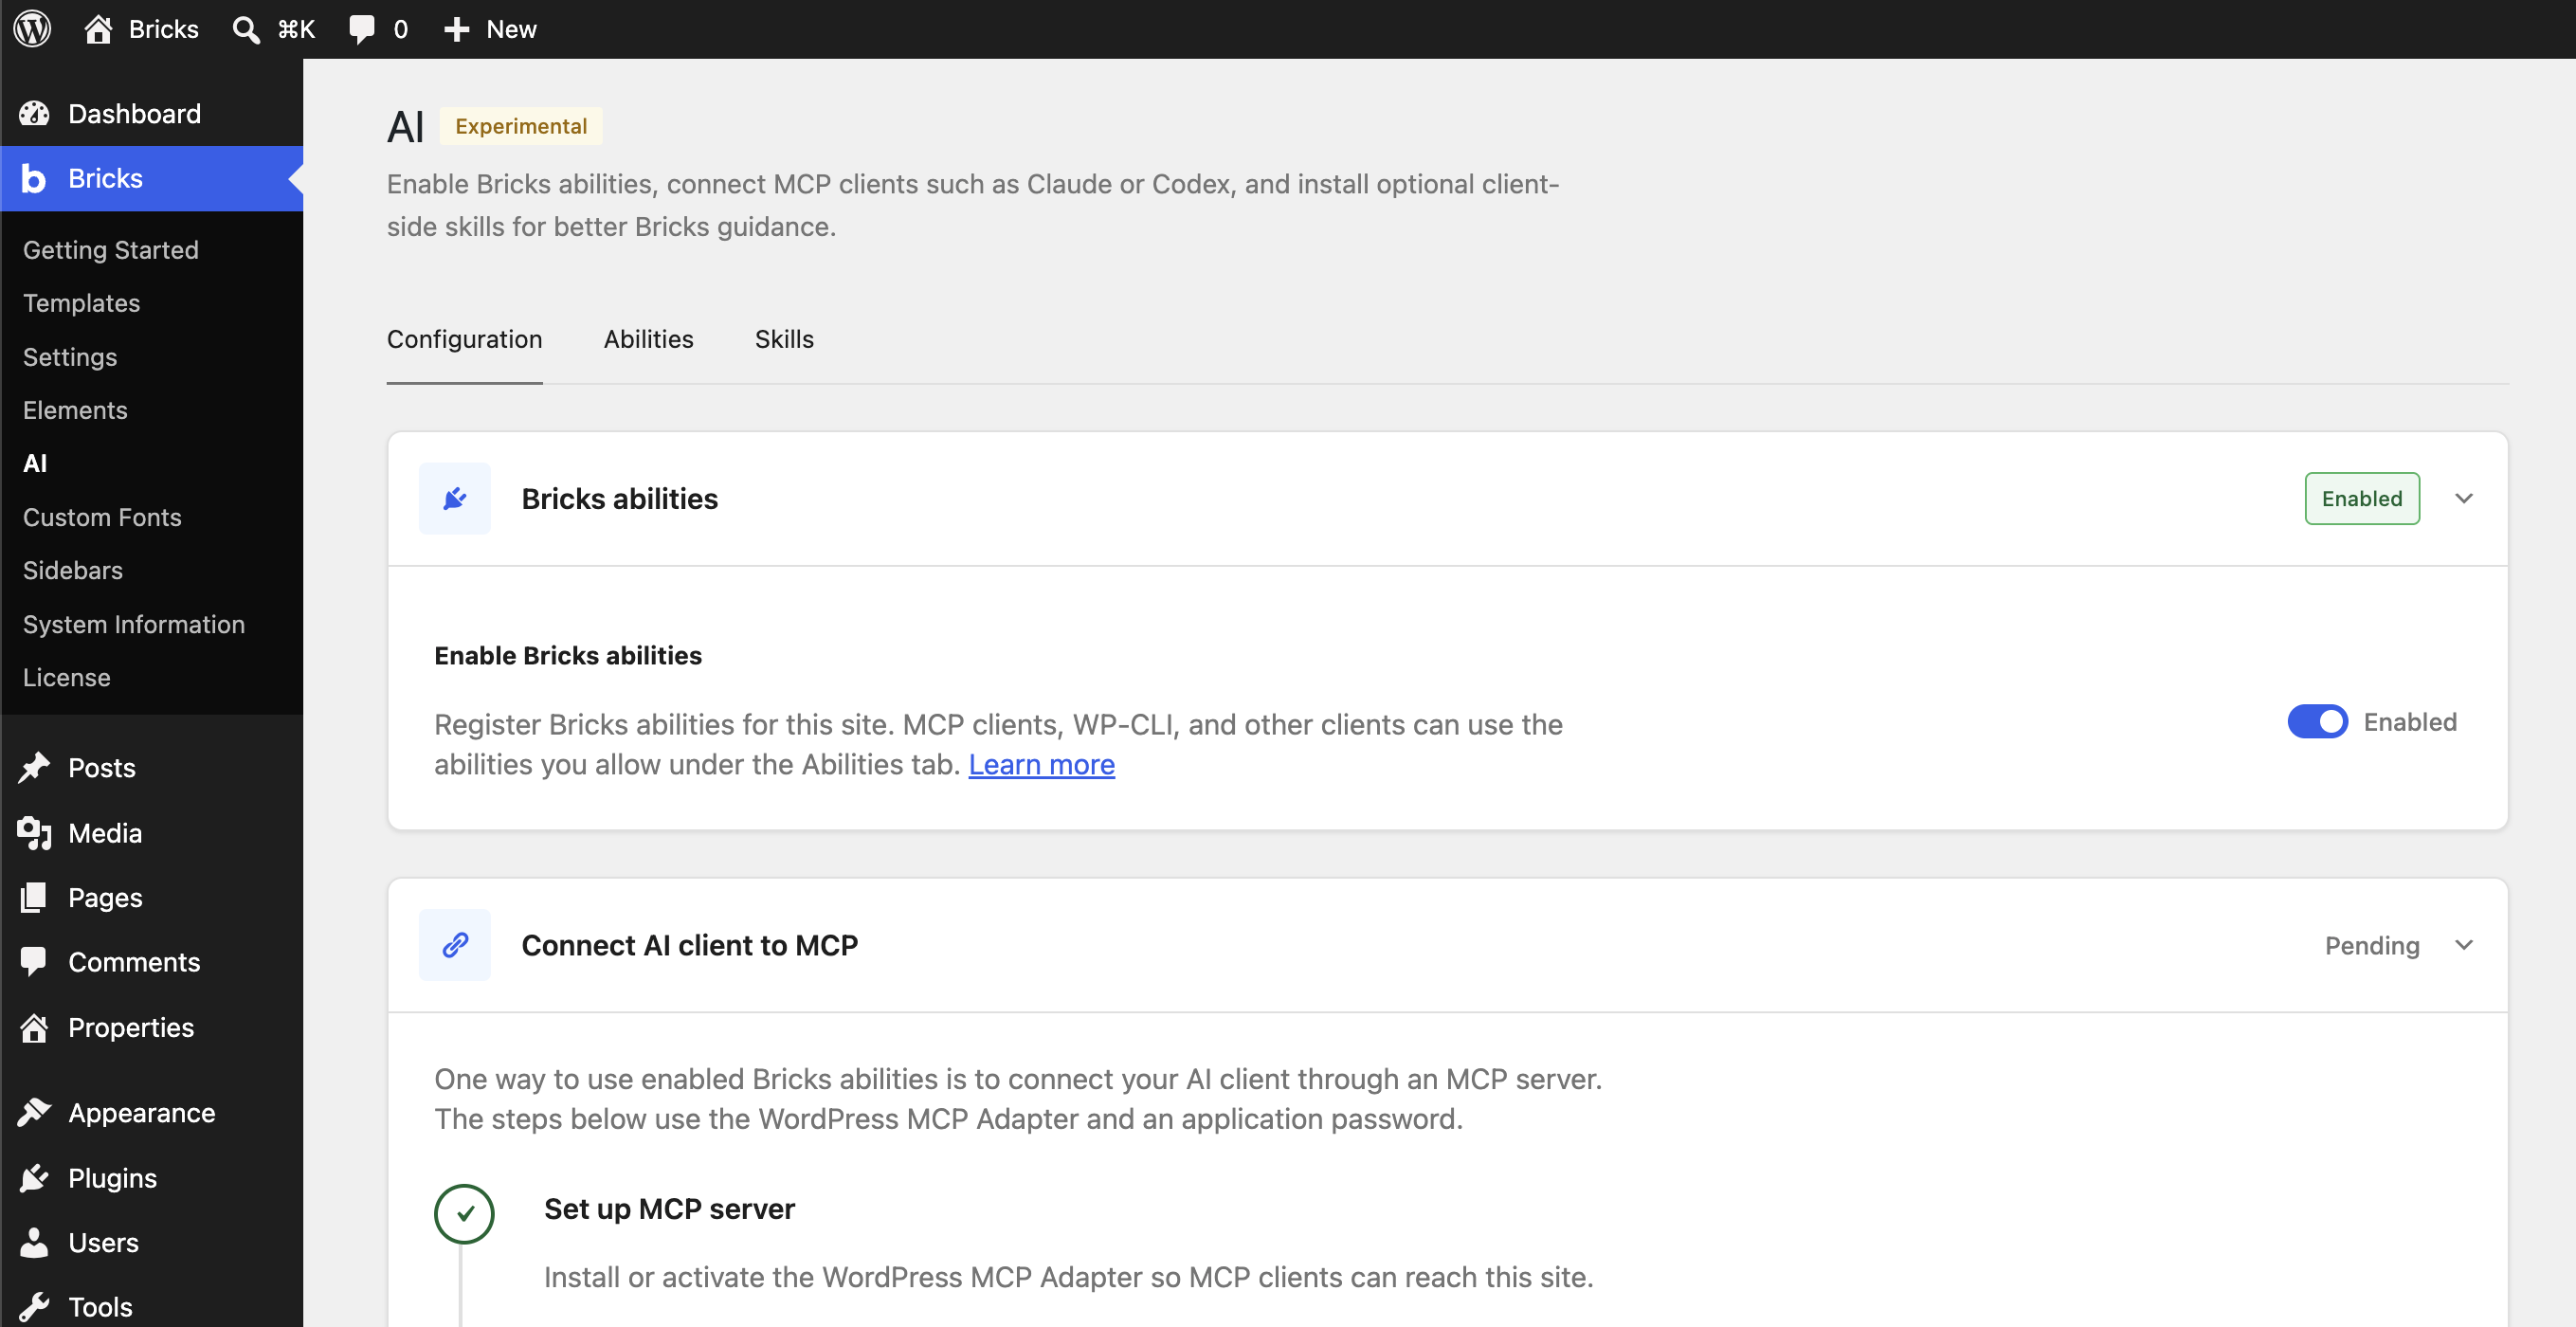
The AI screen is split into three tabs:
| Tab | What it does |
|---|---|
Configuration | Installs or detects the WordPress MCP Adapter, enables Bricks abilities, creates an application password, and generates client-specific MCP config. |
Abilities | Lets you choose which Bricks MCP abilities are available on this site. |
Skills | Helps you install and verify the optional Bricks skills package in your AI client. |
How the connection works
Section titled “How the connection works”The connection has three parts:
| Piece | Lives in | Purpose |
|---|---|---|
| WordPress MCP Adapter | WordPress plugin | Adds the MCP endpoint that exposes registered WordPress abilities. |
| Bricks abilities | Bricks | Registers Bricks actions with the WordPress Abilities API. |
| Bricks skills | AI client | Adds optional Bricks workflow guidance for clients that support skills, rules, or reusable instructions. |
Bricks generates MCP config that runs npx -y @automattic/mcp-wordpress-remote@latest locally. That command connects the AI client to the WordPress MCP endpoint and authenticates with a WordPress application password.
Every request uses the WordPress user behind that application password. Bricks then checks that user’s WordPress capabilities, builder access, and builder permissions before abilities can read or write.
Use an administrator account for setup. Installing the adapter, activating it, saving settings, and creating credentials can require WordPress permissions such as manage_options, install_plugins, activate_plugins, and permission to edit the selected user account.
1. Enable Bricks abilities
Section titled “1. Enable Bricks abilities”Go to Bricks > AI > Configuration. Under Enable Bricks abilities, turn on the toggle and save your settings.
The WordPress Abilities API must be available. The screen recommends WordPress 6.9 or later if the API is missing. The toggle is also disabled when BRICKS_DISABLE_MCP is truthy. Remove that constant or set it to false to allow admin control.
You can enable abilities without installing or connecting the MCP Adapter. For a WP-CLI workflow, continue with WP-CLI access. To connect an MCP client, complete the remaining setup steps below.
2. Set up the MCP server
Section titled “2. Set up the MCP server”Under Connect AI client to MCP, use Set up MCP server to install or activate the WordPress MCP Adapter.
| MCP server status | Meaning | What to do |
|---|---|---|
Not installed | The adapter plugin is not installed. | Click Install plugin, or download the release ZIP through View on GitHub. |
Inactive | The adapter is installed but not active. | Click Activate plugin, or activate it from Plugins. |
Connected | The adapter is active and its REST route is registered. | Create a credential and connect your client. |
Route missing | The adapter is loaded, but the MCP REST route did not register. | Check REST API routing, permalinks, plugin conflicts, and PHP error logs. |
If the one-click installer is unavailable, download mcp-adapter.zip from the WordPress MCP Adapter releases and upload it under Plugins > Add New Plugin > Upload Plugin.
Once connected, Bricks shows the MCP endpoint URL. It usually looks like this:
https://example.com/wp-json/mcp/mcp-adapter-default-serverIf pretty permalinks are unavailable, the endpoint can use the REST route format:
https://example.com/?rest_route=/mcp/mcp-adapter-default-serverAn MCP server connection makes enabled abilities accessible to an MCP client. It does not control whether Bricks can register abilities with WordPress.
Optional: Enable PHP abilities
Section titled “Optional: Enable PHP abilities”PHP abilities cover two security-sensitive workflows: the bricks/execute-php ability runs one-off PHP without storing the submitted snippet, and authorized agents can write and sign persistent PHP in supported Bricks code fields. Both workflows use the same PHP opt-in and safeguards.
bricks/execute-php gives an agent access to the same WordPress and PHP runtime as the site, including functions and data that are not covered by a dedicated Bricks ability.
PHP abilities are disabled by default and cannot be enabled from wp-admin or a database setting. Define the constant in one of these PHP locations before Bricks evaluates the ability:
wp-config.php, before the “That’s all, stop editing” line- A must-use plugin
- A plugin
- A child theme’s
functions.php
Do not edit the Bricks parent theme because theme updates overwrite those changes. Define the constant only once:
define( 'BRICKS_ENABLE_PHP_ABILITIES', true );In a child theme’s functions.php or a plugin, use a guard to avoid redefining the constant:
if ( ! defined( 'BRICKS_ENABLE_PHP_ABILITIES' ) ) { define( 'BRICKS_ENABLE_PHP_ABILITIES', true );}Use the boolean value true. Bricks 2.4 beta and release candidate builds used BRICKS_ENABLE_EXECUTE_PHP_ABILITY. Replace that constant with BRICKS_ENABLE_PHP_ABILITIES before updating. The old constant is not an alias and does not enable PHP abilities.
On a local or staging site, an agent can use this ability to:
- Inspect active plugins, theme and plugin versions, PHP extensions, WordPress configuration, registered hooks, scheduled events, and other runtime state.
- Reproduce a plugin or theme function with the site’s actual data instead of reasoning from an error message alone.
- Read PHP-accessible files and logs, check paths and permissions, or inspect a plugin or child theme implementation.
- Make an explicitly approved file or data repair, then rerun the failing operation to verify the result.
- Run one-off maintenance, migration, or setup tasks without installing a permanent code-snippet plugin.
File access is limited by the permissions of the PHP process. The ability is not sandboxed, so it can also edit or delete files and data that PHP can access. Keep the site backed up and use version control when testing file changes.
Every PHP action must still meet all of these conditions:
- Bricks abilities are enabled, and
BRICKS_DISABLE_MCPis not forcing them off. - The request is authenticated with a WordPress application password.
- The application-password user has the WordPress
manage_optionscapability. - The application-password user has the Bricks
Execute codecapability. - Bricks code execution is enabled under
Bricks > Settings > Custom code. BRICKS_LOCK_CODE_SIGNATURESis not enabled. The signature lock overrides the PHP execution constant.
Persistent PHP is stored only when the agent is authorized to edit the target and the code can be signed. Bricks validates supported HTML and PHP Code field paths before accepting an update, so a field that normally accepts HTML cannot be used to bypass the PHP checks.
Keeping activation in PHP configuration means the ability cannot be enabled through a WordPress option or database setting alone. The permission and configuration checks above run again for every call.
To disable PHP abilities, remove the constant or change it to:
define( 'BRICKS_ENABLE_PHP_ABILITIES', false );The highlighted bricks/execute-php row appears first under Bricks > AI > Abilities. Select View setup to expand the configuration instructions inside the row. Its status shows whether BRICKS_ENABLE_PHP_ABILITIES is undefined, true, false, or invalid, without exposing an unexpected constant value. When the constant is true, a second status shows whether the ability is callable or blocked by another requirement.
3. Create a credential
Section titled “3. Create a credential”Under Connect AI client to MCP > Create a credential, select the WordPress user the AI client should act as, enter a credential name, and click Generate password.
Use a name that identifies the client or workflow, for example Codex staging, Claude local, or Cursor design review.
Copy the generated application password before leaving the page. WordPress only shows it once.
For shared local or staging environments, create a dedicated WordPress user for the AI client instead of using your personal admin account. Give that user only the builder access and WordPress capabilities it needs.
4. Connect your AI client
Section titled “4. Connect your AI client”Under Connect AI client to MCP, choose the client you use. Bricks shows a config block, a command, or a prompt depending on the client.
Use Paste config when the client supports config files. It keeps the setup explicit and keeps credentials out of the chat prompt.
Copy a prompt asks the AI client to help install the MCP server using the same connection details. Use it only in a local or staging workflow, and only with a client you trust with the credential.
Bricks generates client-specific config for many tools. The examples below show the shape of that config, but use the values generated on your site. The generated config includes:
WP_API_URL: the MCP endpoint URL.WP_API_USERNAME: the selected WordPress username.WP_API_PASSWORD: the generated application password.NODE_TLS_REJECT_UNAUTHORIZED=0, only when Bricks detects a local development HTTPS domain that likely uses a self-signed certificate.npx -y @automattic/mcp-wordpress-remote@latestas the local command that connects your AI client to WordPress.
Do not put the application password in the endpoint URL, command arguments, or global shell config. Keep it in the MCP server environment for that client.
Paste the generated block into ~/.codex/config.toml, or merge it with your existing MCP server config:
[mcp_servers.example-com]command = "npx"args = ["-y", "@automattic/mcp-wordpress-remote@latest"]
[mcp_servers.example-com.env]WP_API_URL = "https://example.com/wp-json/mcp/mcp-adapter-default-server"WP_API_USERNAME = "mcp-service-user"WP_API_PASSWORD = "xxxx xxxx xxxx xxxx"
Start a new Codex chat after saving the config so Codex reloads the MCP server.
Run the generated command in your terminal:
claude mcp add example-com \ --env WP_API_URL='https://example.com/wp-json/mcp/mcp-adapter-default-server' \ --env WP_API_USERNAME='mcp-service-user' \ --env WP_API_PASSWORD='xxxx xxxx xxxx xxxx' \ -- npx -y @automattic/mcp-wordpress-remote@latestStart a new Claude Code chat after adding the server.
Many clients use a JSON config shape like this:
{ "mcpServers": { "example-com": { "command": "npx", "args": ["-y", "@automattic/mcp-wordpress-remote@latest"], "env": { "WP_API_URL": "https://example.com/wp-json/mcp/mcp-adapter-default-server", "WP_API_USERNAME": "mcp-service-user", "WP_API_PASSWORD": "xxxx xxxx xxxx xxxx" } } }}Use the exact file path and wrapper key shown in Bricks > AI, because each client names its MCP config differently.
5. Test the connection
Section titled “5. Test the connection”Start a new chat in your AI client and ask:
Call bricks-start-here, then bricks-get-mcp-version, then bricks-list-ability-status.Tell me whether Bricks abilities are available, which Bricks version is connected, and whether any abilities are disabled.If bricks-start-here is not visible as a direct tool, ask the client to call the MCP Adapter dispatcher:
{ "ability_name": "bricks/start-here", "parameters": {}}If the client cannot list Bricks abilities, fix the MCP connection before installing skills or trying a build task.
Managing abilities
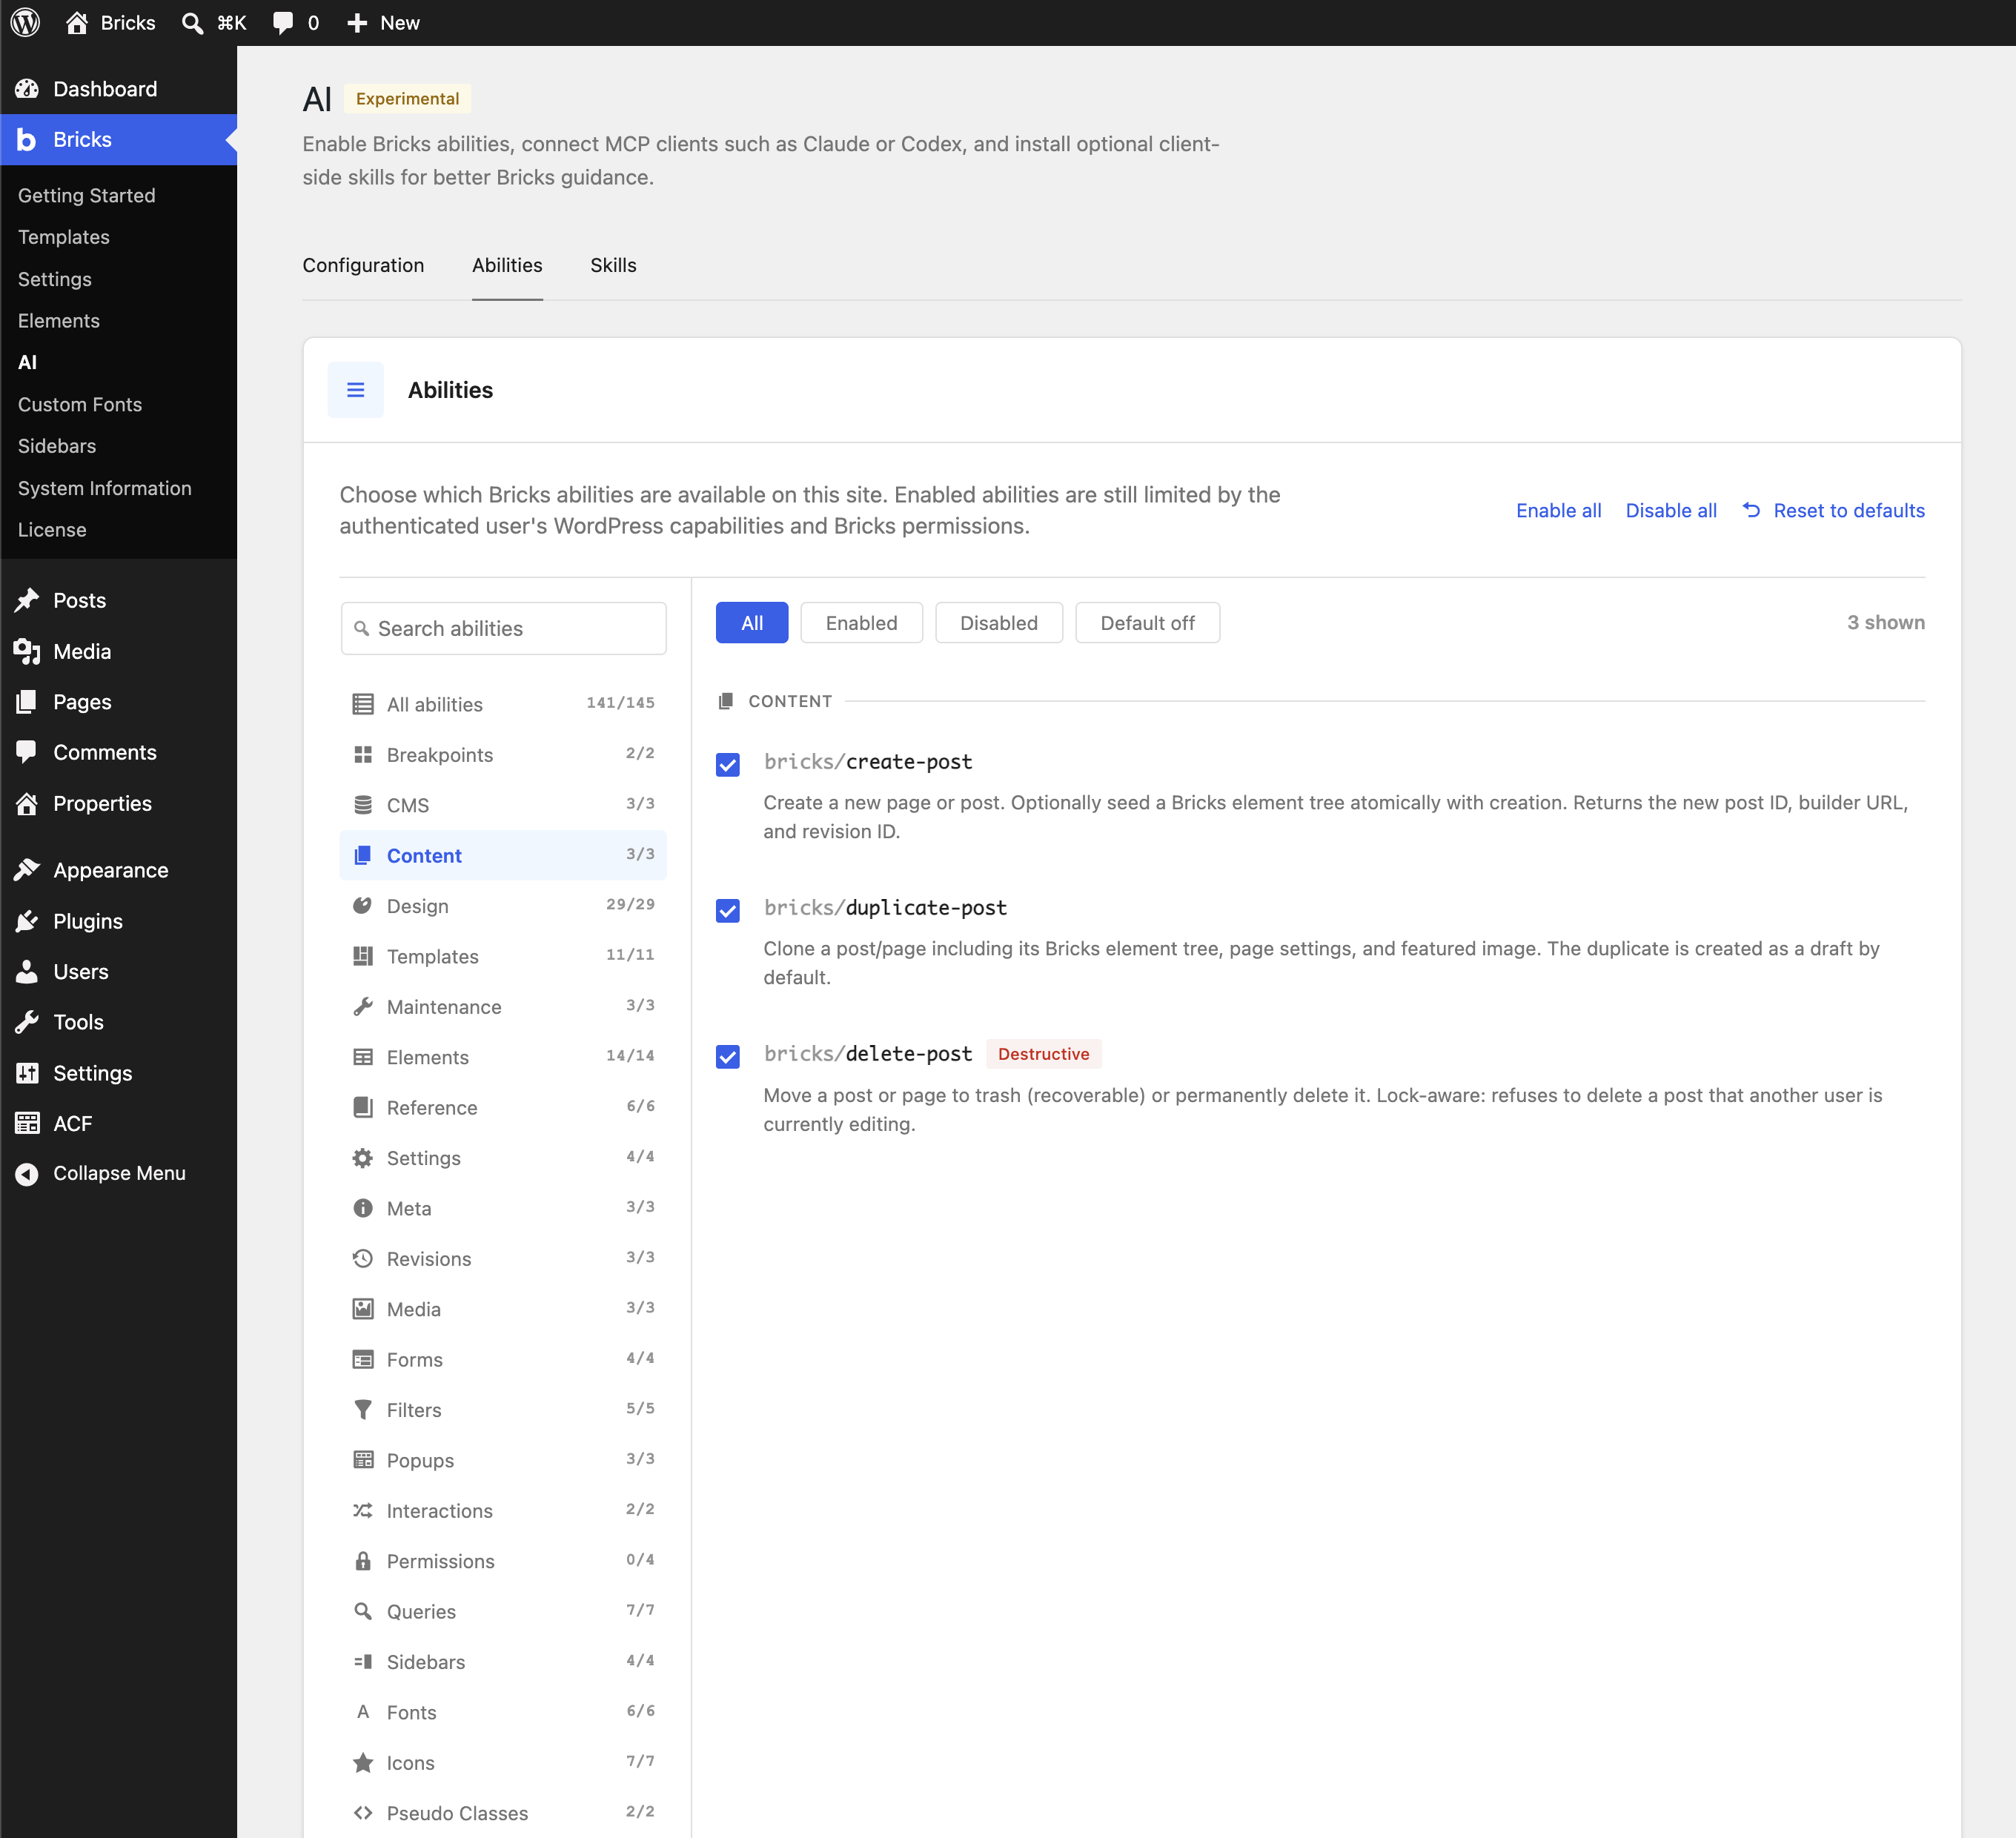
Section titled “Managing abilities”Open Bricks > AI > Abilities to control which Bricks abilities AI clients can use on this site.
Scope abilities by user or role
Section titled “Scope abilities by user or role”Ability toggles are site-wide. Per-user and per-role access comes from the WordPress account used by the MCP connection:
- Go to
Bricks > Settings > Builder accessand create a custom builder capability. - Enable only the actions that account needs, including the relevant post types and element editing permissions.
- Assign the capability to a WordPress role or to one user from that user’s WordPress profile.
- In
Bricks > AI > Configuration, generate the application password for that user and use it in the AI client’s MCP config.
For example, a Client editor capability can allow content and element editing while leaving every permission under Components disabled. An AI client connected with that user’s application password can edit the permitted content, but component abilities and component operations inside element writes are rejected.
WordPress capabilities still apply alongside Builder access. Avoid using an administrator account for a restricted client workflow because users with manage_options receive full builder access. See Builder Access & Capabilities for every permission and the steps for assigning capabilities to roles and individual users.
You can:
- Search abilities by name or description.
- Filter by category, enabled state, disabled state, and default-off state.
- Enable all, disable all, or reset to defaults.
- Review badges such as
Default offandDestructive.
Some diagnostic abilities are always available so clients and admins can understand the connection state:
bricks/start-herebricks/get-mcp-versionbricks/list-ability-status
Most abilities are enabled by default once Bricks abilities are enabled. Sensitive categories, such as builder permission management, are default-off until an admin enables them. Abilities marked destructive can remove data or make changes that are not easy to reverse, so treat them as actions that need clear user approval.
Fast-path tools and dispatcher tools
Section titled “Fast-path tools and dispatcher tools”Bricks registers many abilities, but only common abilities appear directly in an MCP client’s tool list.
Direct MCP tool names use hyphens:
bricks-get-design-contextbricks-get-page-elementsbricks-set-page-elementsAbility names use slashes:
bricks/get-design-contextbricks/get-page-elementsbricks/set-page-elementsIf a Bricks ability is not visible as a direct tool, call it through the MCP Adapter dispatcher:
{ "ability_name": "bricks/get-mcp-version", "parameters": {}}Use bricks-list-ability-status to see which abilities are enabled, which are disabled, and which are default-off.
Add a direct tool
Section titled “Add a direct tool”If your integration frequently calls an ability through the dispatcher, you can expose it as a direct tool on the default MCP server. Add this filter to a custom plugin or your child theme’s functions.php:
add_filter( 'bricks/abilities/named_tools', function( $tools ) {    $tools[] = 'bricks/get-element-schema';
    return $tools;} );
Use slash-separated ability names. Bricks removes duplicates, disabled abilities, and unregistered names once the ability registry is available. Reconnect your MCP client or refresh its tools after changing the list.
This changes tool discovery only. Removing a direct tool does not disable its ability: it remains callable through the dispatcher. Use Bricks > AI > Abilities to disable an ability. User permissions still apply.
Code authoring and HTML/CSS imports
Section titled “Code authoring and HTML/CSS imports”Agents can create and edit Bricks content through the same permissions that apply in the builder. An agent does not receive PHP access merely because it can edit HTML, CSS, or JavaScript.
- HTML authoring requires permission to edit the target and its content settings.
- CSS authoring follows the target resource and style-editing permissions, such as access to the Class Manager and permission to edit global classes.
- JavaScript authoring requires permission to edit the target and the WordPress
unfiltered_htmlcapability. - PHP authoring and signing require the PHP abilities opt-in and every safeguard listed above, including
manage_options, Bricks Execute code, enabled code execution, application-password authentication, and unlocked code signatures.
Code elements retain their existing Execute code permission, global execution setting, and PHP/HTML signing requirements. These abilities do not change how Code elements render or how the builder authorizes them. Writing the signed PHP/HTML field in execution mode uses the PHP abilities safeguards, including when that field contains only HTML.
When an agent imports HTML or CSS, Bricks checks the imported structure and its permissions. Content the connected user is not allowed to create is omitted automatically. A one-call import can apply the retained content and returns a prominent partial result with the omitted elements and the reason for each omission. An explicit preview is also available before applying an import.
Bricks rejects an import when the retained tree is empty or invalid. It also rejects a nonempty replacement when any source content was omitted or invalid, because it could remove existing content incompletely. Review the reported omissions, adjust the source or permissions, and run the import again.
Settings Abilities and Remote Libraries
Section titled “Settings Abilities and Remote Libraries”The settings abilities use an allow-list rather than exposing the entire bricks_global_settings option:
bricks/list-settings-schemalists supported keys and their value types.bricks/get-global-settingsreads allowed settings.bricks/set-global-settingsupdates only the keys sent in the request.bricks/list-credential-statusreports whether known credentials are configured without returning their values.
The Remote Templates and Remote Components settings use these keys:
| Setting key | Ability behavior |
|---|---|
myTemplatesAccess | Readable and writable boolean for exposing this site’s templates. |
myComponentsAccess | Readable and writable boolean for exposing this site’s components. |
myTemplatesWhitelist | Readable and writable newline-separated URL whitelist shared by templates and components. Its stored key keeps the older name for compatibility. |
remoteTemplates | Reads and writes remote-library URLs and optional display names. Stored passwords are preserved but never returned or written through the abilities. |
myTemplatesPassword | Excluded from settings reads and writes. bricks/list-credential-status reports only whether the shared Remote access password is configured and identifies it as used by remote template and component access. |
The myTemplatesPassword key also keeps its older internal name for compatibility. AI and MCP clients cannot read, replace, or clear the password. Manage it in Bricks > Settings > Templates & components > Remote access.
Installing Bricks skills
Section titled “Installing Bricks skills”Skills are optional. Get the MCP connection working first.
Open Bricks > AI > Skills and copy the install prompt. Paste it into the AI client you want to use. The prompt points the client to the Bricks skills repository, asks it to install the matching skills or rules format, and asks it to report which Bricks skills were installed.
Then copy the verification prompt from the same tab. Start a new chat and ask the client to list loaded Bricks skills.
If no Bricks skills are loaded, the MCP connection can still work. The client can call bricks-start-here at the beginning of a session to get the core Bricks workflow rules, fast-path tool names, and dispatcher example.
Skills help with workflows such as:
- Designing or auditing a design system.
- Creating pages and templates.
- Working with query loops and dynamic data.
- Writing element conditions and interactions.
- Converting HTML and CSS into Bricks element data.
- Verifying frontend output with screenshots or browser automation.
WP-CLI access
Section titled “WP-CLI access”Bricks abilities are registered with the WordPress Abilities API, so they are not limited to MCP clients.
For developer checks, WP-CLI can access the same registered abilities from the command line. The WordPress Developer Resources page for wp ability describes it as the command for abilities registered through the WordPress Abilities API.
Useful checks:
wp ability list --namespace=bricks --user=adminwp ability get bricks/get-mcp-version --user=adminwp ability run bricks/get-mcp-version --user=adminwp ability run bricks/list-ability-status --user=admin --format=jsonUse --user so permission checks run in the same WordPress user context your MCP connection would use.
This is separate from the Bricks-specific wp bricks ... commands, and it is not required for the MCP setup above. It is a WordPress Abilities API surface for any registered ability, including abilities from Bricks and other plugins.
Security model
Section titled “Security model”Treat an MCP-connected AI client like a real WordPress user.
- Each call runs as the authenticated WordPress user, for example the application-password user or the
--userpassed to WP-CLI. - Bricks checks WordPress capabilities, builder access, and Bricks builder permissions before abilities can read or write.
- The Abilities tab controls which Bricks abilities are available on the site.
BRICKS_DISABLE_MCPinwp-config.phpprevents Bricks from registering abilities, including for WP-CLI use.- PHP execution and persistent PHP authoring share a strict boolean opt-in in PHP configuration. Each action rechecks application-password authentication,
manage_options, Bricks Execute code, enabled code execution, and the code-signature lock. - Application passwords can be revoked from the selected user’s WordPress profile.
- Post and template element writes create Bricks revisions where supported. Global data writes, such as classes, variables, theme styles, and components, are not covered by post revisions.
Recommended defaults:
- Use local or staging for first tests.
- Use a dedicated WordPress user for the AI client in shared testing environments.
- Disable abilities that are not needed for the workflow.
- Review destructive actions before approving them in the AI client.
- Revoke old application passwords.
Troubleshooting
Section titled “Troubleshooting”| Symptom | Likely cause | What to do |
|---|---|---|
| The Bricks abilities toggle is disabled | The WordPress Abilities API is unavailable, or BRICKS_DISABLE_MCP is truthy | Use WordPress 6.9 or later if the API is missing, or remove the constant/set it to false. A connected MCP Adapter is not required to enable abilities. |
MCP server enabled but endpoint did not register | The adapter loaded, but the REST route is missing | Check /wp-json/, permalink settings, plugin conflicts, and PHP error logs. |
| The client cannot connect | Wrong endpoint, wrong credential, or the client did not reload config | Confirm the endpoint in Bricks > AI, regenerate or re-copy the application password, then start a new chat. |
| Application passwords are unavailable on a local HTTP site | WordPress enables application passwords by default only over HTTPS or when the environment type is local | Use HTTPS when possible. For a local HTTP site, add define( 'WP_ENVIRONMENT_TYPE', 'local' ); to wp-config.php. |
| Application passwords are unavailable for one user | A security plugin, filter, or user-level restriction disabled application passwords | Check the selected user, security plugins, and filters that control WordPress application password availability. |
The client only shows mcp-adapter-* tools | Bricks direct tools are not loaded or the ability is outside the fast path | Use mcp-adapter-discover-abilities, call long-tail abilities through mcp-adapter-execute-ability, and check bricks-list-ability-status. |
| A Bricks ability returns disabled | The ability is off in Bricks > AI > Abilities | Enable the ability or reset abilities to defaults. |
bricks/execute-php is unavailable | BRICKS_ENABLE_PHP_ABILITIES is missing, a required permission is missing, code execution is disabled, or code signatures are locked | Open Bricks > AI > Abilities, select View setup for bricks/execute-php, and follow the blocked requirement shown there. |
| Local HTTPS fails | The local certificate is not trusted by the local npx process | Use the scoped NODE_TLS_REJECT_UNAUTHORIZED=0 generated by Bricks for local development, or trust the local certificate. |
| The AI client keeps asking for approval on every tool call | The client has per-tool approval settings | Approve the Bricks MCP server or adjust that client’s MCP approval settings if you trust the workflow. |
Upload or conversion exceeds a size limit
Section titled “Upload or conversion exceeds a size limit”If an ability rejects a file or HTML/CSS input as too large, reduce its size before retrying. Bricks uses these defaults unless a site customization changes them:
| Operation | Default limit |
|---|---|
Media upload (bricks/upload-media) | The site’s WordPress upload limit; remote downloads have a 30-second timeout |
Font upload (bricks/upload-custom-font-file) | 8 MiB per decoded font file |
SVG icon upload (bricks/upload-custom-icon) | 1 MiB of SVG markup |
HTML/CSS conversion (bricks/convert-html-css-to-bricks-data) | 2 MiB of combined HTML and CSS, including CSS-only input |
1 MiB is 1,048,576 bytes. Base64 encoding makes an upload request larger than the file itself. If the request fails before Bricks returns an error, check your hosting, proxy, and MCP client’s request limits as well.
Example prompts
Section titled “Example prompts”Start with explicit instructions. Ask the client to inspect the site before writing.
You are connected to a Bricks site through MCP.Call bricks-start-here, then inspect the design system and the current page before making changes.Do not create duplicate global classes or variables.Preview or read back your changes before reporting that the task is done.Build a first pass of a page:
Create an About page for this Bricks site. Use the existing design system, keep the style consistent with the homepage, and show me the plan before saving.Replace static content with dynamic data:
Find the static listing cards on the homepage and replace them with a query loop that pulls the Listing post type. Use the existing card styling.Audit before changing:
Audit the site's global classes, variables, and templates for naming drift or duplicated patterns. Show me the report first. Do not change anything yet.Was this helpful?
A quick vote and short notes help us improve these docs faster.
Leave a note for us
Please do not include passwords, license keys, or personal data. We store submitted notes to improve the docs.
Thanks for sharing feedback. We're using it to improve these docs.